
That moment you’re fully immersed in nature, your rhythm syncs with the path, and you move with a quiet confidence—this is the heart of a great hike. But that flow can shatter in an instant if you trip on a hidden root or slip on loose gravel. What separates a nervous walk from a relaxed adventure is a simple yet powerful skill: actively observing your surroundings.
This isn’t just about watching your feet. It’s about building a real-time mental map. You learn to spot risks before they become problems, giving you more time to react. This proactive approach works whether you’re on a local nature path or a steep mountain route.
Mastering this awareness transforms your entire experience. You’ll feel more in control and ready to enjoy the scenery. It’s a fundamental skill that pairs perfectly with tools like a well-used hiking GPS, ensuring you’re prepared for whatever the trail presents.
Key Takeaways
- Trail scanning is a proactive awareness system, not just watching your step.
- It helps you identify potential hazards early, giving you time to react safely.
- This skill builds confidence and allows for a more relaxed, enjoyable hike.
- Effective scanning creates a mental map of the path ahead for smoother navigation.
- The techniques are universal and apply to any terrain, from easy paths to challenging mountains.
- Developing good habits takes practice, but the safety benefits are immediate.
Understanding Trail Scanning and Hazard Recognition
The ability to spot dangers before they become problems is what separates novice hikers from experienced ones. Knowing what to look for transforms random observation into strategic awareness.
Identifying the types of hazards on a trail
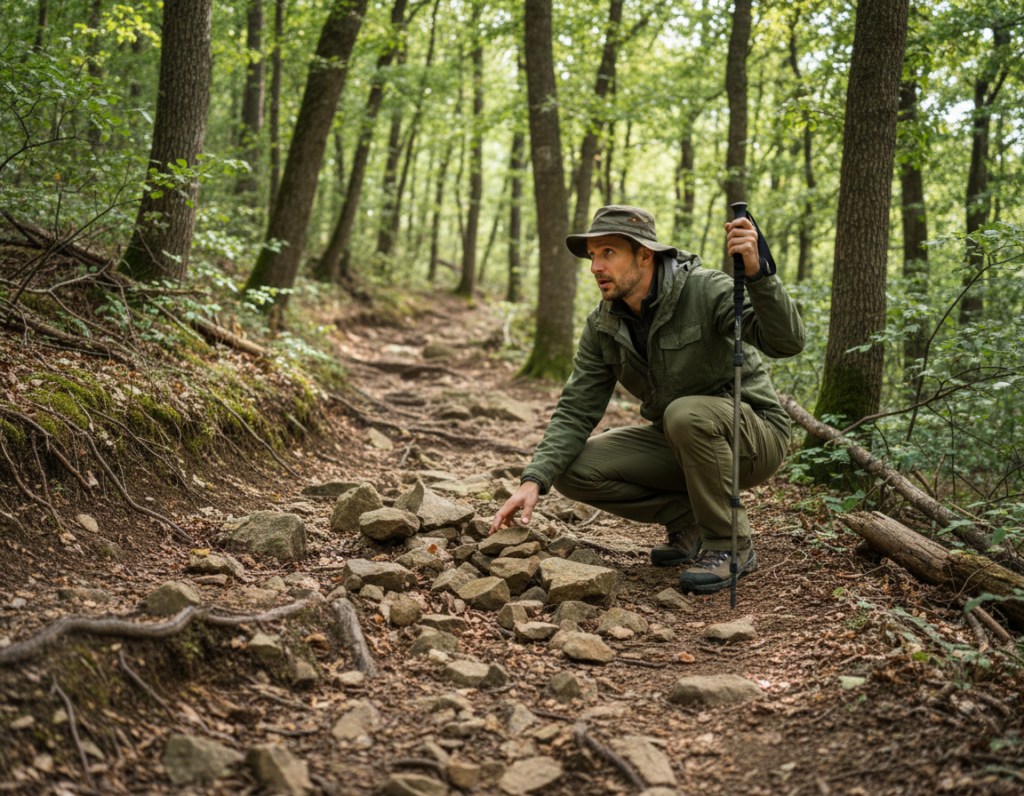
Hiking risks fall into two main categories. Stationary objects like large rocks and exposed roots are always present. These predictable obstacles require careful foot placement.
Moving elements present different challenges. Other hikers, wildlife, and weather changes appear unexpectedly. You must stay alert for these potential risks.
| Hazard Type | Examples | Management Approach |
|---|---|---|
| Actual Risks | Rocks, roots, tree stumps, gaps | Plan path around stationary objects |
| Potential Risks | Wildlife, other users, weather | Stay alert for sudden changes |
| Combined Hazards | Rocks hidden by leaves | Extra caution in complex areas |
Observing features that signal upcoming risks
Nature provides clues about what lies ahead. Changes in vegetation often indicate shifting terrain. Water sounds suggest stream crossings requiring careful footing.
Worn trail edges may signal unstable ground. Steep grade transitions demand slower pace. Recognizing these signs helps you prepare for challenges.
Different terrain types present unique obstacle patterns. Forest paths have more roots and low branches. Rocky mountain routes require watching your step constantly.
Effective Trail Scanning Techniques
Good path awareness starts with how you use your eyes and body together. This systematic approach becomes second nature with practice. It creates comprehensive awareness for a safer, more enjoyable hike.
Step-by-step methods for scanning the trail
Keep your chin up and your gaze forward. Focus your eyes about 10 to 20 feet ahead on moderate paths. This gives you enough time to process what’s coming.
Follow a simple sequence. First, look far ahead for major terrain changes. Next, focus on the mid-range section where you’ll be in a few steps. Finally, glance down briefly for precise foot placement on tricky spots.

Your peripheral vision is also a powerful tool. Use it to maintain awareness of path edges and nearby obstacles. Your central vision can stay locked on the main route ahead.
| Path Condition | Primary Focus Distance | Recommended Pace |
|---|---|---|
| Technical (rocks, roots) | 5-10 feet | Slow, deliberate steps |
| Moderate (smooth dirt) | 10-20 feet | Steady, comfortable pace |
| Easy, open terrain | 30-50 feet | Confident, faster stride |
Adjusting your eyes and body for better awareness
Your posture supports your vision. An upright stance keeps your eyes naturally forward. Relax your shoulders so your head can move freely.
Adjust your focus based on difficulty. Tough sections need a shorter sight line and slower pace. Smooth areas allow a longer view and more speed with maintained control.
Practice this on familiar routes first. You can experiment with different eye positions without worry. Soon, this method will feel automatic, letting you enjoy the scenery.
Preparing Your Body and Mind for Trail Scanning
A strong, stable body is the foundation that makes proactive observation possible. Your eyes identify risks, but your muscles and balance provide the control to navigate them safely. This physical readiness turns good awareness into effective action.
Focus on building leg strength and core power. These muscle groups keep you upright on uneven ground. Strong legs mean you can trust your footing, freeing your mind to focus on the path ahead.
Building physical strength and balance for better control
Key exercises develop the specific skills you need. Bodyweight squats build overall leg power. Lunges improve single-leg stability, which is crucial for stepping over obstacles.
Don’t forget balance training. Practice standing on one foot for 30 seconds. This simple exercise dramatically improves your stability. It prepares your feet and ankles for unexpected shifts in terrain.
Core strength is vital for maintaining good posture. A strong core prevents fatigue that causes you to hunch over. This keeps your gaze forward, not down at your feet.
| Training Focus | Key Exercises | Primary Benefit |
|---|---|---|
| Leg Strength | Squats, Lunges, Calf Raises | Stable footing and power for steps |
| Balance | Single-Leg Stands, Heel-to-Toe Walk | Improved control on uneven surfaces |
| Core Stability | Planks, Side Planks | Upright posture for better vision |
This physical training builds mental confidence. When you trust your body’s abilities, you feel more capable. That “I can do this” mindset reduces anxiety and lets you enjoy the hike.
Adapting to Changing Trail Conditions
The path beneath your feet is never the same twice. Weather, season, and even the time of day transform the ground you walk on. Effective observation means adapting your expectations to what’s in front of you now, not what you remember from last time.

Recognizing variations in terrain and surface conditions
Start by reading the soil. Dark, rich brown earth often means good moisture and traction. Light tan or gray soil suggests dry, loose conditions that can be slippery.
Look for visual cues that signal danger. A glossy sheen on rocks or roots means they’re wet. Moss-covered surfaces and shiny mud patches require extra caution. Adjust your pace to maintain control over these tricky spots.
Your approach should shift with the seasons. Each time of year presents unique obstacles that change your priorities.
| Season | Common Conditions | Key Focus |
|---|---|---|
| Spring | Mud, washouts, saturated ground | Constant assessment for stable footing |
| Summer | Loose, dry surfaces, dust | Watching for shifting gravel and dirt |
| Fall | Leaf-covered rocks and roots | Identifying hidden obstacles |
| Winter | Ice, snow, frozen ground | Detecting hidden ice patches in shade |
Use the information you gather to plan your steps. Choose to step on grass next to a muddy section. Place your feet on the uphill side of angled roots for better stability. This proactive decision-making is the mark of an experienced hiker.
Practice and Training for Improved Trail Awareness
Building consistent habits is what turns conscious effort into automatic response. Your observation skills become second nature with the right training approach.
Start with familiar routes where you can focus on developing good habits. This comfortable environment lets you concentrate on your skills without navigation stress.
Drills and exercises to increase scanning speed
Try the “far-near-far” method during your practice sessions. Shift your focus between distant path sections and immediate ground every few steps.
Name obstacles aloud as you spot them to reinforce pattern recognition. This exercise speeds up your mental processing over time.
Use recovery hikes for deliberate training. Your relaxed pace creates mental space to refine your observation techniques.
Integrating scanning into your hiking routines
Choose footwear with reliable traction to support your training. Good shoes let your mind focus on observation rather than footing worries.
Set specific goals for each outing, like maintaining forward focus on moderate sections. Track your progress as your observation distance increases.
These methods transform practice into habit. Soon, you’ll maintain safety awareness while enjoying the scenery around you.
Conclusion
The true reward of developing keen trail observation skills is the freedom to hike with complete confidence. This approach transforms what could feel like a risky walk into a smooth, enjoyable experience on any path.
Remember the core principles: keep your eyes looking ahead, understand different hazard types, and adapt to changing conditions. These fundamentals work whether you’re on a local nature walk or a challenging mountain route.
Building this awareness takes practice, but the benefits start immediately. Begin with familiar paths where you can focus without pressure. Soon, you’ll feel more capable on more difficult terrain.
Effective observation belongs in every hiker’s toolkit, right alongside proper shoes and good route planning. It’s a skill that enhances safety and enjoyment at every level. These methods work for day hikes, backpacking trips, and everything in between.
Mastering this way of hiking opens up new possibilities. Paths that once seemed intimidating become manageable adventures. For more foundational advice, check out our 10 essential hiking tips for beginners to build your skills from the ground up.
