
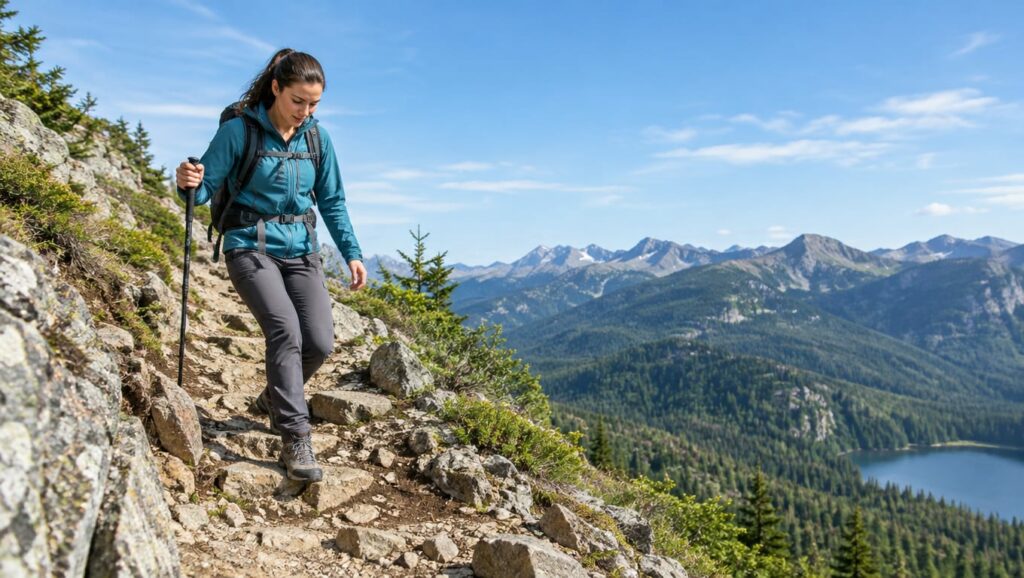
Descend steep trails by shortening your stride, keeping your weight over your feet, and moving slowly enough to place each step. Learning how to descend steep trails without injury comes down to control: soft knees, stable footing, a balanced pack, and no speed you can’t stop immediately. Use trekking poles where they help, use your hands when the ground demands three points of contact, and turn back when a slip would carry serious consequences.
Last updated: 2026-10-19
How do you descend steep trails without injury?
Use these steps in order. Technique gets much harder to fix once your toes hurt and your legs start shaking.
- Tighten your footwear and stabilize your pack.
- Keep your torso stacked over your feet.
- Take short, soft-kneed steps.
- Slow down before loose or wet ground.
- Choose stable footing with a safe runout.
- Use your hands when two feet aren’t enough.
- Face the rock for short downclimbs.
- Adjust or stow trekking poles as needed.
- Zigzag across gentle open slopes.
- Pass only at wide, stable spots.
- Stop before fatigue turns into a fall.
The goal is to finish the descent with enough control left for the last rocky switchback. That matters more than looking quick near the summit.
Set up your feet and pack before the descent
Start with heel hold. Tighten the laces over your midfoot so your heel stays planted, but don’t crush your toes. If your foot slides forward inside the shoe, every step drives your toenails into the front.
Trim long toenails before the trip. If you already know a toe or heel rubs on descents, tape that spot before it gets hot. Waiting for a blister to announce itself is generous but unhelpful.
Your footwear also needs useful traction for the actual trail conditions. Worn tread can feel fine on dry dirt and then skate across wet roots or dusty rock. Stiff boots won’t rescue poor foot placement.
Finally, tighten the pack’s hip belt and shoulder straps enough to stop sway. Heavy items should sit close to your back. A loose pack can shift downhill just as you commit to a step, which is an irritating way to discover gravity still works.
Adjust your poles before starting down. On ordinary trail, a modestly longer setting can keep you from folding forward. However, you may need a shorter pole on the uphill side of a traverse.
Use a short-striding, soft-kneed stance
Keep your torso upright and stacked over your feet. Bend your knees enough to absorb each landing, then take small, deliberate steps. Short and steady steps make balance easier because your center of gravity stays close to your base.
Point each foot toward its landing spot. Then place the whole sole when the surface allows it. On rocky ground, scan a few steps ahead while still checking the patch under your next foot.
Very small steps may look fussy. They also make it much easier to catch a slip before it becomes a slide.
How do you slow down on a steep descent?
Reduce momentum before the steep section. Shorten your stride, pause at stable spots, and let faster hikers go ahead. Once you’re rushing, every loose stone becomes a small argument you have to settle while moving.
Use your knees as suspension. Keep them soft, place your foot under your body, and avoid stiff-legged landings. If you need to stop, plant both feet on stable ground instead of braking through a long slide.
On a broad slope, walk a shallow zigzag where the trail and vegetation allow it. Crossing open ledges and rock laterally can dramatically reduce the grade. However, don’t cut switchbacks or widen the trail to make your own route.
Deep, loose material calls for more commitment. In loose soil, gravel, or snow, plunge heel-first and commit to the step; there, aggressiveness trumps caution. That holds only where the loose layer is deep, because a thin layer over hard rock can roll under your shoe like ball bearings.
Choose the safest line down
The safest line is usually the one with stable footing and mild consequences if you slip. It may take longer than the direct route. Take it anyway.
Read each short section before stepping into it:
| Surface | Better choice | Common problem |
|---|---|---|
| Solid rock | Dry, textured patches with full-sole contact | Dust, moss, or sloping slabs |
| Loose rock | Larger settled stones and short steps | Rocks that shift under full weight |
| Dirt | Firm tread with visible edges | Loose soil over hard ground |
| Roots | Step between dry roots when possible | Wet roots and toe-catching gaps |
| Scree | Controlled traverses with space below | Sending rocks toward other hikers |
| Wet ground | Rough surfaces with a safe runout | Smooth rock, mud, and algae |
| Trail edge | Inside line with room to recover | Crumbling tread above exposure |
Look beyond the next foothold. A stable rock is a poor choice if a slip from it sends you over an edge. Meanwhile, a less tidy line may offer grass, dirt, or a wide bench that stops a short slide.
Roots can trip you, rocks can give way, and sand, water, or snow can make the next surface slicker than the last. For more detail, use these rocky trail footwork techniques before a route with sustained boulder fields.
A Glacier National Park safety guide advises hikers crossing moving rivers to face upstream, move slowly, and use trekking poles for stability. Check each submerged foothold before shifting your weight. If the current is strong or the crossing would sweep you into rocks, find another route or turn around.
Use your hands when the ground demands it
Put your hands down when you need three points of contact. A low stance can help on steep rock, a short eroded bank, or ground where one foot must move while the other foothold is small.
Test every handhold before trusting it. Push or pull gently, then load it. Loose rocks, dead branches, shrubs, and clumps of grass can fail with very little warning.
Keep your fingers away from gaps where shifting rock could pinch them. Gloves can protect your palms, but they don’t turn rotten stone into a secure hold. Also, keep your hips close to the slope so your arms guide balance rather than hold your full body weight.
Sitting can work on a short, low-consequence muddy bank or gentle snow slope. Still, sliding removes much of your braking control and soaks whatever part of your clothing you were hoping to keep dry. Stand again as soon as you reach stable ground.
Climb down short rocky steps face-in
Face the rock when a steep step is too awkward to descend while facing outward. Keep three points of contact, test each hold, and lower one foot at a time. You should know where that foot will land before you commit your weight.
Move in this order:
- Check that both hands and one foot are secure.
- Look down and choose a clear foothold.
- Lower one foot without stretching to reach it.
- Shift weight only after the foothold holds.
- Move one hand to the next tested hold.
- Repeat until you can turn and walk normally.
Keep your pack close to the rock without letting it catch above you. If the pack pulls you backward, remove loose items or get help lowering it only when the terrain and group can manage that safely.
A rocky step that requires climbing skill, exposed moves, or unfamiliar equipment has stopped being ordinary hiking. Reverse the move while you still know your holds. Pride has poor traction.
Use trekking poles without letting them trip you
Trekking poles can improve balance and take some load from tired knees on an ordinary descent. Plant them slightly ahead and to the side, then step between them. Don’t reach so far that your shoulders pull in front of your feet.
Adjust the length for the ground. A slightly longer setting can help on a steady downhill, while the uphill-side pole may need shortening on a traverse. Keep the tips close enough that they don’t snag behind rocks.
Stow both poles before a scramble that requires your hands. Dangling poles catch on brush and rock, while wrist straps can trap a hand during a fall. For setup and planting details, see how to use trekking poles correctly.
Poles help with balance. They don’t make wet slab, unstable scree, or a poor route choice safe.
Cross gentle grassy slopes with a shallow zigzag
On a gentle grassy slope, a shallow zigzag reduces the grade. It also keeps your breathing calmer than walking straight down while braking hard.
Use that method only on firm, dry grass where access rules allow off-trail travel. Wet grass can be slicker than it looks, especially over hard soil. Hidden holes, rocks, and uneven drainage channels also make speed a bad bargain.
Stay on the built trail where leaving it would damage plants or cause erosion. A shortcut that saves effort today can become a muddy scar after the next rain.
If you want less cardio on the descent, slow the pace and soften your knees. Running downhill merely sends the work to your joints and asks them to sort it out.
Pass at a wide, stable spot
Communicate before passing. A calm “passing on your left” gives the other hiker time to find secure footing. Don’t appear at their shoulder while both of you are balancing on loose rock.
Uphill hikers have the right of way. If you’re descending, stop at a wide, stable spot and let them climb through. However, safety beats ceremony, so use whichever turnout keeps both people away from a loose edge.
For overtaking another downhill hiker:
- Ask before moving past.
- Wait for firm, wide ground.
- Keep poles and pack straps under control.
- Pass at walking speed.
- Give children, dogs, horses, and loaded hikers more room.
- Never force someone onto scree or a crumbling trail edge.
Local rules can differ, especially on shared-use trails. Trail signs and land-manager rules come first.
Manage knees, toes, and fatigue early
Downhill travel is often harder on your knees than climbing because your thighs must brake your body at every step. Going uphill may demand more from your lungs, but descending exposes weak control, tired quadriceps, and poor pack balance.
Slow down before your legs start trembling. Take brief standing breaks on level ground, drink regularly, and eat before energy drops. A break taken early costs less time than a fall taken late.
Knee pain is a warning to change something. Shorten your steps, reduce speed, use poles, and avoid stiff-legged landings. Sharp pain, swelling, buckling, or a worsening limp deserves more than another mile of optimism.
Use standing knee hikes for balance
Standing knee hikes train the balance and hip control that help on uneven descents. Stand tall on one foot, lift the other knee toward your chest, then lower it with control. Hold a tree or trekking pole if your balance is poor.
Keep the standing knee soft and your torso quiet. Don’t lean backward to lift the leg higher. The useful part is controlling the lift and return, not trying to make the movement dramatic.
Switch sides and stop if the standing knee hurts or the ankle keeps rolling. This is balance practice, not a test of how long you can wobble beside the trail.
Add knee hikes before steep trips
Knee hikes also work as a simple warm-up before a steep descent. Lift one knee, pause briefly, lower it, and alternate sides while walking slowly on level ground. They wake up the hips without tiring the muscles you need for braking.
Use them before the trail gets steep, not halfway down a loose slope. On rocky ground, keep your feet planted and use standing knee hikes instead. A moving warm-up is useful only when it doesn’t create a new problem.
For long routes such as a Pacific Crest Trail section, train the braking motion before carrying a full pack. Step-downs, controlled split squats, and gradual downhill walking build the relevant strength. This guide to leg exercises for steep hiking covers that preparation in more detail.
Practice movement before the trip and arrive less stiff. However, last-minute hard workouts won’t rebuild your knees. Use gentle walks, controlled step-downs, and normal recovery rather than cramming hard workouts into the final days.
Beginners should also choose modest routes. Irish beginner-route guidance recommends starting with less than 200 metres of elevation gain. That won’t fit every landscape, but the judgment is sound: learn downhill control before adding a long descent and a loaded pack.
Stop when it is no longer a hiking problem
Some ground requires climbing skill, snow training, or a different route. Wet slab above exposure, unstable scree, lightning, darkness, injury, and overwhelmed confidence are reasons to stop and reassess.
Wet or icy ground makes a slip more likely, as does high wind. If the chance of falling is medium or high and the consequences are also high, think carefully before proceeding. Retreat, wait for conditions to change, use a marked bailout point, or call for help.
In Glacier National Park, steep snowy slopes are a red flag for avalanche danger during winter and early spring. Safety guidance for the park tells uncertain hikers to stay on well-traveled routes and avoid steep, snowy slopes. Consult local forecasts through Avalanche.org. Trekking poles and careful feet don’t replace avalanche training.
Descending steep trails safely includes knowing when walking technique is no longer enough. The trailhead will remain unimpressed by heroics and pleased to see you back.
FAQ
Should I descend sideways on a steep trail?
A partial sideways stance can help on a short, steep section because it reduces the effective grade. Keep your hips facing mostly downhill and avoid crossing your feet. Full sideways travel becomes awkward if your ankles twist or the trail is too narrow.
Are trail runners or boots safer for steep descents?
Either can work if the fit is secure and the tread suits the surface. Trail runners usually feel lighter and place more precisely, while boots may help with rough ground, snow, or a loaded pack. Worn soles and a sliding heel cause more trouble than the label on the shoe.
What should I do if I have no trekking poles?
Use shorter steps, pause at stable spots, and keep your hands free. A sturdy stick may help on simple ground, but test it before loading it and don’t trust dead wood near exposure. Good foot placement still does most of the work.
Should I remove my pack before climbing down a rocky step?
Keep it on if the step is simple and the pack stays balanced. Remove it only when the weight blocks movement or pulls you away from the rock, and only if you can place or lower it without dropping it onto someone. If managing the pack becomes a climbing operation, back up and choose another route.
