
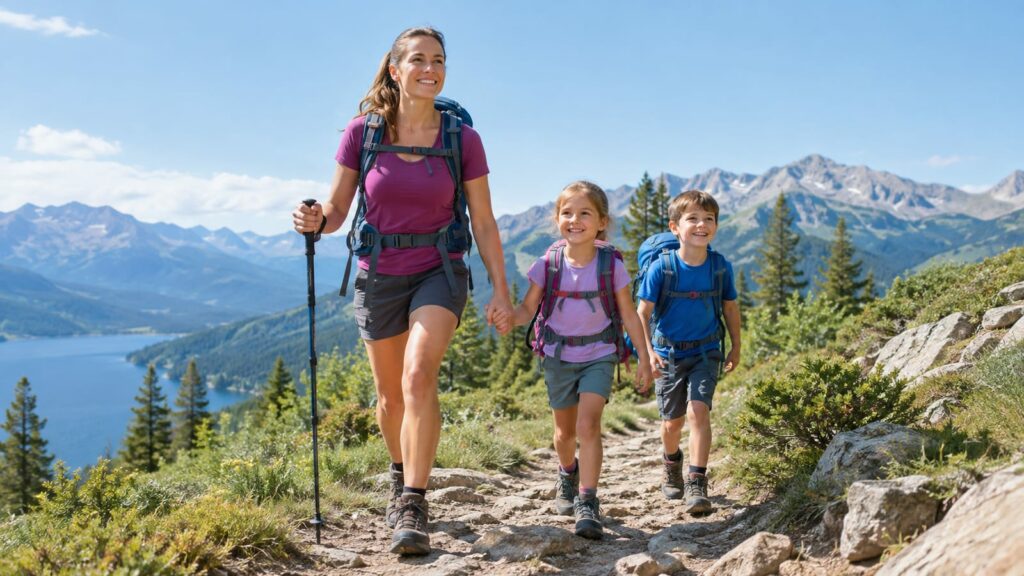
Start with an easy trail, a short outing, and enough time for snacks, puddles, bathroom stops, and sudden interest in one particular stick. To hike with young kids successfully, choose gentle terrain with a clear bailout point, carry water and spare layers, let children set the pace, and turn around before hunger or fatigue takes over. Flat nature paths, short woodland loops, and firm creekside trails can all work. The goal is a good family outing, not a summit photo with a tired toddler melting beside it.
Last updated: 2026-09-30
Young children do well outside when the plan leaves room for stops that have nothing to do with hiking. Pick a route with shade, firm footing, useful bailout points, and something worth stopping for. Then head back while everyone is still reasonably pleasant.
A family hike should be short, flexible, and built around comfort. If the trail only works when everyone walks on schedule, it’s the wrong trail for this trip.
Starting Age for Hiking with Young Kids
There’s no magic starting age for family hiking. Babies can join in a properly fitted carrier, while toddlers can walk short sections when they’re steady on their feet and interested in moving.
The useful question is what your child can safely manage that day:
- Babies: Keep them close in a supportive carrier. Watch their head position, body temperature, and exposure to sun, wind, and insects.
- One-year-olds: Expect a mix of carrier time, standing, and slow walking. Flat paths with room to stop are easier than narrow routes beside steep edges.
- Two-year-olds: Plan for wandering, crouching, snack breaks, and repeated stops. Their walking range can change fast with sleep, heat, and mood.
- Older preschoolers: They can often walk farther, but they still need simple terrain and frequent reasons to keep going.
Age helps you plan, but it doesn’t decide the route by itself. A confident two-year-old may handle a gentle woodland path better than a tired four-year-old on a hot, exposed climb.
For babies and young toddlers, use a carrier that keeps your hands free and lets you monitor the child. Don’t put a child in a carrier and then treat the hike like a normal adult outing. Your balance changes, your water access gets worse, and a fall has higher stakes.
How to plan a hike with young kids
Choose the trail around the child’s limits, then build the outing around the conditions.
- Pick the route before leaving. Look for gentle grades, shade, reliable parking, and an easy way to turn back.
- Check the conditions. Heat, mud, wind, bugs, and recent rain can change an easy path into a bad choice.
- Set a turnaround point. Don’t wait for a full meltdown to decide the hike is over.
- Pack for comfort. Bring water, familiar snacks, layers, wipes, a basic first-aid kit, and spare clothing.
- Let children set the rhythm. Adults can walk faster. That doesn’t make the family hike better.
- Stop before they’re spent. A short hike that ends well gives you a reason to return.
- Leave the trail clean. Pack out wipes, food scraps, and every “interesting” object that came from your bag.
Keep the route boring enough to be safe and interesting enough to hold attention. Gentle grades, clear footing, and a few features worth stopping for usually beat a famous trail with a steep climb and nowhere to escape.
You can also use this family hiking trip safety checklist before leaving. It helps catch the plain problems that cause the most trouble, such as forgotten water, poor footwear, and no plan for a sudden weather shift.
Easy feature-friendly trails
Young children need a reason to keep walking. A trail with a creek, bridge, boardwalk, large rocks, open meadows, or interesting trees gives them small goals without turning the outing into a forced march.
Look for:
- Firm, mostly even footing
- Gentle slopes instead of long climbs
- Shade during hot weather
- Places to sit away from the trail
- Clear trail markers
- A nearby bailout point
- Parking that doesn’t require a long road walk
- Enough width for a carrier and a child walking beside you
A loop can be useful because the scenery changes as you go. However, an out-and-back trail is often easier with toddlers. You can turn around at any point without wondering how far remains.
Avoid exposed drop-offs, fast water crossings, loose rock, and long sections with no shade. Those features may sound adventurous in a trail description. On a family outing, they mostly create more hand-holding, more warnings, and less fun.
Check the official land manager’s trail page before leaving. The U.S. Forest Service and local park agencies often post closures, fire restrictions, and trail conditions. A route that was easy last month may be muddy, washed out, or closed today.
Tips for a calmer family hike
The right routine prevents more problems than extra gear. Before you leave the trailhead, explain the few rules that matter:
- Stay where an adult can see you.
- Stop when an adult says stop.
- Don’t touch unknown plants, mushrooms, or animals.
- Ask before going near water or an edge.
- Tell an adult quickly if you’re hurt, cold, hot, or need the bathroom.
Keep those rules short. A toddler will not remember a speech about wilderness risk while staring at a beetle.
Let your child choose between small options. They can pick the first snack, decide which side of the trail to inspect, or choose the next stopping place. They still need boundaries, but a little control reduces the feeling that the adults are dragging them through the woods.
Plan the outing around your child’s best time of day. An early start can help in hot weather, but it’s a poor choice if your child loses the morning to a missed nap. Sleep, heat, and hunger usually matter more than the scenic quality of the route.
For more ideas that work once the novelty wears off, use these ways to keep kids entertained while hiking. Don’t bring a complicated activity kit. A simple scavenger hunt, trail bingo, or “find something rough and something smooth” game is enough.
Making hikes fun for families
Toddlers don’t hike for distance. They hike for puddles, sticks, bugs, bridges, and the chance to walk through a patch of leaves.
Use nature activities that fit the trail:
- Find leaf shapes without picking the leaves.
- Listen for birds, running water, or wind.
- Look for animal tracks in mud.
- Count bridges, trail signs, or fallen logs.
- Compare rough bark with smooth stones.
- Ask what might live under a log, then leave the log where it is.
- Let the child photograph a flower or rock with a simple camera.
- Stop for a snack where there’s something safe to watch.
Avoid turning every stop into a lesson. Kids learn more when they’re allowed to notice things first. Add a fact after they ask, or after they’ve had time to look.
A small reward can help, but don’t make candy the whole structure of the hike. Let the trail provide most of the interest. If the outing only works with constant prizes, the route is probably too long or too dull.
Plan lots of time
Extra time is the most useful family hiking gear. Young children walk slowly, stop often, and can turn a short distance into a full investigation of one wet leaf.
Build time for:
- Getting shoes and layers on
- Walking from the car to the trail
- Bathroom or diaper stops
- Snacks and water
- Removing grit from shoes
- Exploring safe features
- Carrying a tired child back
- Finding the trailhead parking area
Don’t plan the hike around the adult walking time listed on a map. That estimate usually assumes steady movement by a person who isn’t stopping to inspect every ant.
A loose schedule also gives you a bailout point. If the child is fading, turn around while the mood is still recoverable. The right ending is often “we stopped early and everyone was fine.” That beats pushing on until the walk home becomes a rescue mission.
Preparing for ordinary problems
Preparation for a family hike should cover ordinary problems first. Most bad outings begin with cold hands, wet socks, low blood sugar, or a forgotten diaper. You don’t need a survival store on your back. You do need the basics within reach.
Pack:
- Water for each person
- Familiar snacks with some staying power
- A small first-aid kit
- Wipes and diaper supplies if needed
- A plastic bag for wet or dirty clothing
- A spare layer for the child
- Sun protection and insect protection
- A charged phone
- A simple map or downloaded trail map
- A light if the outing could run late
- Any medicine your child may need
Tell another adult where you’re going and when you expect to return. Keep the route details in your phone and, if possible, carry a paper map. Cell service can disappear beside a road, in a canyon, or under dense trees.
Check the weather from an official source such as the National Weather Service. Watch for more than rain. Heat, strong wind, lightning, smoke, and a fast temperature drop can end a family hike before the clouds look dramatic.
If a child is injured, confused, unusually sleepy, or showing signs of heat illness, stop the hike and get help. Move to shade or shelter when you can, keep the child with an adult, and use local emergency services when the situation is beyond basic first aid. A calm retreat is a successful decision.
Layered clothing for changing weather
Dress children in layers they can remove without a fight. A base layer should move sweat away from the skin, a warm layer should add insulation, and an outer layer should block wind or rain.
A practical setup looks like this:
| Trail condition | Clothing plan | What to watch |
|---|---|---|
| Warm and dry | Light shirt, sun hat, comfortable pants or shorts | Sunburn, overheating, and wet sweat |
| Cool morning | Base layer with a warm layer over it | Remove layers before the child gets sweaty |
| Windy ridge | Warm layer plus wind-blocking shell | Cold hands and exposed ears |
| Light rain | Quick-drying base layer and rain shell | Wet cuffs, soaked shoes, and condensation |
| Muddy trail | Durable pants, extra socks, and a spare layer | Cold legs and slippery footing |
Avoid heavy cotton as the main layer in cool or wet conditions. It holds moisture and takes too long to dry. Also avoid dressing a child so warmly that they sweat before the first break.
Check the child’s neck, back, and hands rather than guessing from your own comfort. A baby in a carrier can get warmer than the adult carrying them. A toddler standing still beside a creek can get cold while you’re walking.
Gear that earns its place
Young children don’t need adult backpacking gear. They need equipment that fits, stays secure, and doesn’t create another problem.
Lightweight kid-safe backpack
Choose a small child’s backpack with an easy harness, comfortable shoulder straps, and compartments that protect key items from rain. A chest strap can help keep the pack stable, but don’t load it with heavy gear just to make the child feel involved.
Use the child’s pack for light items such as:
- A small snack
- A soft layer
- Tissues or wipes
- A lightweight water bottle
- A trail card or small nature notebook
Keep first aid, extra clothing, and most water in the adult’s pack. A tired toddler carrying a heavy bag becomes a balance problem before they become a responsible little backpacker.
A pack with waterproof compartments is useful in wet weather, but it isn’t a substitute for a dry bag or plastic liner. Pack leaks happen. So do puddles.
Comfortable hiking shoes for kids
Sturdy, wide-toed shoes with reliable grip can help on uneven ground. Fit matters more than a serious-looking upper. A stiff boot that rubs the heel will end the hike faster than a flexible shoe with good traction.
For easy park paths, ordinary athletic shoes may be good enough. Use sturdier footwear when the trail has loose rock, mud, roots, or a rough descent. The right shoe keeps feet secure without turning a short walk into a break-in project.
A heavier shoe can earn its place on rough ground, but it still needs to flex without rubbing.
Check for:
- Enough room for toes to spread
- A secure heel that doesn’t lift
- Grip suited to the trail surface
- No hard seam pressing on the ankle
- Socks that stay smooth under the foot
Have your child walk around before the hike. Don’t discover a rubbing heel beside a creek with miles left to go. A shoe can look sturdy on a hang tag and still be the wrong choice for a child’s foot.
Simple navigation tools
Use a basic map, a downloaded trail map, or a simple hiking app. You need to know where you are, where the trail ends, and where you can turn around. You don’t need a complicated GPS watch for a short family loop.
Keep navigation in the adult’s hands. Let older children look at a printed map and spot trail signs, but don’t make a young child responsible for staying on course.
The main navigation rule is plain: know the route before you start. If the trail forks, check the map before choosing. Guessing is fine at home. It’s less charming after the path disappears into thick brush.
You can also read this guide on choosing family-friendly hiking trails before picking a route.
Who should skip the hike today?
Skip the outing, shorten it, or move it indoors if the conditions are wrong. A child who is sick, badly overtired, or recovering from an injury doesn’t need a motivational speech about fresh air.
Reconsider the trail if:
- The forecast brings dangerous heat, lightning, or strong wind.
- The ground is icy, flooded, or badly washed out.
- You can’t carry enough water.
- The route has exposed edges or unsafe crossings.
- Parking or access is uncertain.
- The adults are already stressed before leaving.
- Your child has no dry clothing left after the first wet section.
You can still go outside without forcing the planned hike. Visit a flat nature path, walk near home, or spend time at the trailhead watching birds. Flexibility keeps family hiking alive. Rigid plans are how a pleasant morning becomes a story nobody wants repeated.
Benefits of outdoor time
Regular outdoor time gives children space to move, notice things, and practice small decisions. They learn how to walk over roots, slow down near water, and cope with a little discomfort without turning every problem into an emergency.
Parents get something useful too. A family hike creates time without a screen, a schedule full of errands, or a house that needs cleaning. It also shows you what your child can handle and where the plan needs work.
The benefits build slowly:
- Children gain confidence from manageable challenges.
- Families practice communication outside the usual routines.
- Kids learn to observe plants, animals, weather, and trail signs.
- Parents learn which clothing, snacks, and routes actually work.
- Everyone gets more comfortable with stopping, turning back, and trying again.
Don’t measure success by distance. If your child remembers the bridge, the beetle, or the snack break, the hike did its job.
FAQ
Can you use a stroller on a hiking trail?
A stroller works on a flat, firm path with enough width and no rough drop-offs. It becomes a poor choice on roots, loose rock, deep mud, or narrow trails where you’d need to lift it. Check the surface before leaving, and bring a carrier if the route may become too rough.
How should you carry a child who falls asleep?
Use a properly fitted carrier that supports the child’s head and keeps their face clear. Check their position during breaks, especially in warm weather. A sleeping child can get hot or slump into an unsafe position without making enough noise to warn you.
What should you do if a child wanders out of sight?
Stop and call the child’s name loudly. Check the nearest risks first: water, edges, and trail junctions. If you haven’t found the child within a few minutes, call 911 or the park or ranger number posted at the trailhead. Don’t keep searching on your own. If another adult is with you, one of you stays at the spot where the child was last seen. If you’re hiking alone, stay near that spot with any other children while you make the call. Before the hike, teach your child to stay in one place and shout or blow a whistle if they lose sight of you.
Is a family hike still successful if you turn around quickly?
It still counts as a success. Turning around early protects the child’s comfort and leaves the adults with a workable memory of the outing. A bailout is part of route planning, not proof that the hike failed.
How can you prepare a child for their first longer trail?
Start with short walks near home and let the child practice the shoes, pack, snacks, and trail rules before the real outing. Increase the challenge only when the basics feel ordinary. The first longer trail should test the route, not your child’s patience.
