
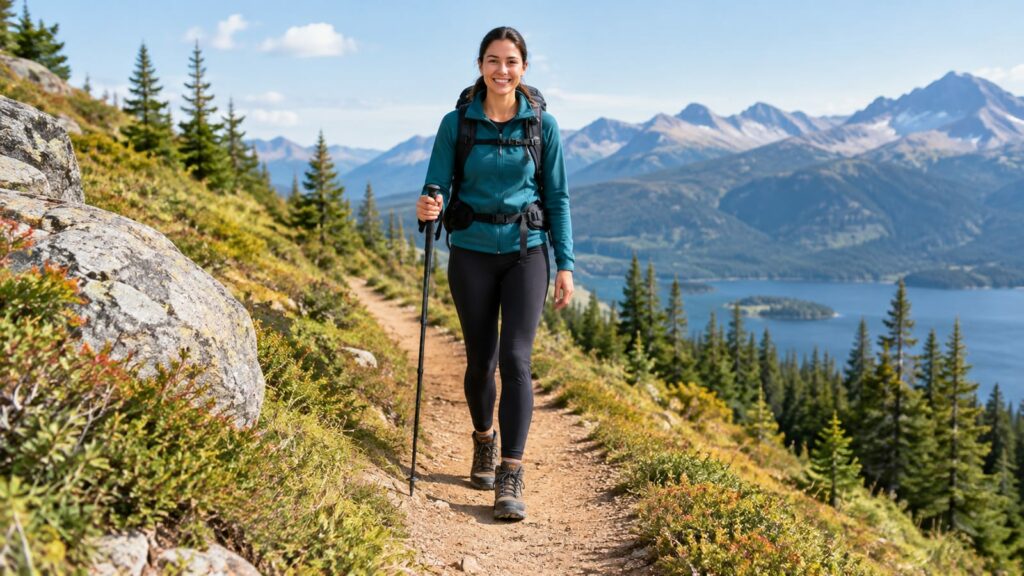
Marked hiking paths protect wildlife, fragile ground, and you. They also give you the safest route around cliffs, unstable slopes, deep mud, deadfall, and terrain nobody has checked or maintained. That’s why it’s important to stay on marked hiking paths: you lower your chance of getting lost, avoid preventable injuries, and keep one shortcut from becoming a damaged trail that costs time and money to repair. Finishing faster is rarely worth the trade.
Last updated: 2026-10-01
Why is it important to stay on marked hiking paths?
Marked trails balance three things that hikers need:
- Safety: Trail builders choose routes around known hazards and difficult terrain.
- Navigation: Blazes, signs, and trail junctions give you reliable reference points.
- Landscape protection: A defined path keeps foot traffic from spreading across plants, soil, and wildlife habitat.
The route may not be the straightest line. That’s the point. A switchback loses elevation without sending you down a steep slope. A bridge keeps feet out of a wet area. A narrow path through brush keeps hikers from widening the route around one muddy patch.
The National Park Service advises hikers to stay on marked trails, check trailhead signs, and bring a map so they know the correct path. Those simple steps protect you, other visitors, and the habitats of plants, fungi, and animals.
How the marked path protects wildlife
Wild animals use more than the visible trail. They feed beside it, nest under cover, cross between habitats, and rest in places that look empty to you. Walking off route can push animals away from food or shelter, especially during nesting, birthing, and winter seasons.
By hiking responsibly, we help keep their homes wild and natural. That means staying on the official route, keeping your voice down near wildlife, and leaving animals an escape route.
Maintaining a safe distance from wildlife
When you watch wildlife, keep enough distance that the animal can act normally. If it stops feeding, changes direction, watches you closely, or moves away, you’re already too close.
Yellowstone National Park prohibits approaching bears or wolves on foot within 100 yards (91 m), and other wildlife within 25 yards (23 m). Its safety guidance adds cougars to the 100-yard group and names bison and elk among the animals that need 25 yards (23 m).
Rules can vary by park, so check the local notice before you start walking. You can read the National Park Service's wildlife-watching guidance before a trip where large animals are common.
Use binoculars or your camera’s zoom. Keep children close. Never touch, chase, surround, or call an animal toward you for a better photo.
In Yellowstone, it is illegal to willfully stay near or approach wildlife, including birds, at any distance that disturbs or displaces the animal. Never feed wildlife. In national parks, feeding, touching, or teasing animals is illegal, and the National Park Service warns that feeding is dangerous for the animals and for you.
Staying on the path lowers the chance of surprising a snake
Staying on marked paths helps you avoid pushing through brush, rock piles, and dense grass where snakes may be resting. It also makes your footsteps more predictable, which gives animals a better chance to move away.
That does not make a snake encounter impossible. Watch where you place your hands and feet, give a snake room to leave, and do not try to move it with a stick. Staying on the path is a sensible reduction in risk, not a magic shield.
Prevent erosion and trail damage
Off-trail shortcuts loosen soil and create new channels for rainwater. Once water starts flowing down a shortcut, it can cut deeper into the slope and carry soil onto the official trail.
National Geographic notes that leaving designated trails can start erosion that weakens the soil’s ability to hold native plants and makes the trail itself less stable.
Shortcuts also widen trails. One person steps around mud. The next person follows the same line. Soon, the trail has two edges, then three, and the damaged ground becomes harder to repair.
Yosemite National Park puts the rule plainly: taking shortcuts causes trail erosion. The scenic route is often the one with fewer maintenance problems.
You can learn more about the practical causes of damage in this guide to reducing erosion while hiking.
Avoid trampling plants, fungi, and fragile ground
A marked trail protects more than large trees. It also protects seedlings, moss, fungi, shallow roots, and soil that may take years to recover.
On the Colorado Plateau, National Geographic explains, a living layer called biocrust holds the desert soil in place against wind and water. Once damaged, biocrust may recover slowly in the dry climate.
Dry ground can look empty while doing important work. The same goes for a patch of lichen or a cluster of small plants that seems easy to step over. You usually cannot see the damage below your boot.
Stick to maintained trails, designated campsites, rock, gravel, sand, dry grasses, or snow when travel outside the path is allowed. Those are durable surfaces under the Leave No Trace guidance. Read the Leave No Trace Seven Principles before a trip with camping or cross-country travel.
If you’re camping, good campsites are found, not made. Don’t clear vegetation or flatten a new spot beside the trail.
Stay clear of hidden hazards
Trail builders and land managers assess the official route. They may add steps, drainage, signs, bridges, or barriers where the terrain needs them. An unofficial shortcut has none of that help.
Off-route travel can put you near:
- Unstable slopes and loose rock
- Cliffs hidden by brush or poor visibility
- Deep mud that can trap a boot
- Deadfall and branches under tension
- Thin ice over water or soft ground
- Flood channels and washed-out banks
- Dense brush where you cannot see your footing
A trail that looks longer may be avoiding the problem you cannot see from above. Cutting across a switchback can turn a normal descent into a loose-rock slide. Going around a puddle can put you on a steep, muddy edge.
Trail signs also tell you when conditions have changed. Check them before walking past a closure, washed-out bridge, or wildlife warning. A closed trail is not a suggestion from someone who enjoys making your day less convenient.
Reduce the risk of getting lost
Marked paths give you repeatable navigation points. You can match blazes, signs, junctions, bridges, and bends with your map. That system becomes more useful when fatigue, rain, fog, snow, or poor light makes every tree look like the last tree.
Off-trail travel removes those references. You may think you’re taking a shortcut, then spend extra time finding the path again. That costs daylight and water, and it can turn a small navigation mistake into a long walk.
Before leaving the trailhead:
- Check the trailhead map and posted notices.
- Identify the official route and major junctions.
- Bring a map, even if you expect phone service.
- Note the last clear landmark before a confusing section.
- Turn around before fatigue makes the decision for you.
A map helps, but it does not replace attention. Look behind you at junctions so the return route looks familiar from the other direction.
Why a shortcut is rarely worth the time saved
Staying on marked paths is not about speed. The goal is to finish safely while leaving the landscape intact.
A shortcut may save a few steps and cost you a twisted ankle, a damaged slope, or an unnecessary search for the official route. It can also disturb wildlife and encourage the next hiker to follow the same bad line.
Keep your pace steady on climbs and loose descents. If the official route feels slow, that may be because it is managing water, grade, erosion, or exposure. A trail is not a race track with trees.
How to stay on marked hiking paths
Follow this simple process before and during the hike.
- Read the trailhead signs. Look for closures, one-way sections, wildlife notices, and route changes.
- Match signs with your map. Confirm the trail name and direction before leaving the trailhead.
- Watch for blazes and markers. If the markers disappear, stop instead of guessing.
- Stay on the built surface. Walk through mud when the trail allows it rather than widening the edge.
- Use official pullouts. Step aside where the trail provides space for passing or views.
- Yield with care. Move to a durable surface when needed, and avoid crushing plants beside the path.
- Leave shortcuts alone. A worn side path is evidence of repeated damage, not permission to use it.
- Pack out your waste. Pack out all trash, leftover food, and litter.
- Keep dogs and children with you. Their wandering can disturb wildlife and create extra side paths.
- Turn around when conditions exceed your plan. A bailout point is smarter than forcing a route.
This advice is less exciting than charging ahead. It also works better after mile 10, when your judgment has started asking for a snack.
What to do when a marked trail is unclear or blocked
Stop as soon as the route stops making sense. Do not follow the most obvious boot track, because the obvious boot track may lead to a campsite, a water source, or somebody else’s mistake.
Use this order:
- Check the map and your last confirmed trail marker.
- Look for an official closure sign or reroute.
- Check the park or land manager’s current notice if you have service.
- Backtrack to the last known point.
- Wait for better visibility if weather caused the confusion.
- Turn around if the route remains uncertain.
Do not create a new social trail. Social trails are unofficial paths formed by repeated foot traffic. They spread impact into places that were never selected, drained, or maintained as trails.
If a tree blocks the route, step back and report the obstruction through the land manager’s official channel when possible. Climbing around it may put you on a steep slope or start another shortcut.
Leave No Trace beyond the trail
Staying on the path is one part of responsible hiking. Your food, trash, pets, and campsite can also change animal behavior and damage habitat.
Keep the rest of your trip simple:
- Pack out all trash, leftover food, and litter.
- Never feed wildlife.
- Keep food and scented items secured where local rules require it.
- Camp at least 200 feet from lakes and streams to protect riparian areas.
- Use durable surfaces instead of clearing a new campsite.
- Keep wildlife encounters quiet and brief.
- Follow local fire, dog, camping, and seasonal closure rules.
A reusable bottle cuts disposable waste, but it does not excuse leaving a bottle cap, food wrapper, or leftover snack behind. Animals do not care that the packaging was recyclable.
For more practical steps, see this guide to hiking lightly and protecting the trail.
The payoff of staying on the official route
Staying on marked paths gives you a safer route, clearer navigation, and fewer surprises underfoot. It also keeps trail crews from repairing damage that hikers caused while trying to save time.
The payoff reaches beyond your own hike. Plants keep growing beside the trail. Wildlife keeps using connected habitat. Rainwater stays closer to the drainage pattern the trail was built to handle.
Set the example other hikers can follow. Walk the official route, ignore tempting shortcuts, and turn around when the markings stop making sense. That keeps the trail usable for the next person and the landscape intact for everyone after them.
FAQ
Can I leave the marked trail on durable ground?
Only when local rules allow it and the route does not cross protected habitat, private land, or a closed area. Durable surfaces such as rock, gravel, sand, dry grasses, or snow handle foot traffic better than living soil, but they are not automatically open for travel.
Should I stay on the trail when it is muddy?
Usually, yes. Walking around mud widens the trail and can damage plants along the edge. If the mud is deep, unsafe, or part of a closure, stop and check for an official reroute instead of making your own.
What should I do if another hiker takes a shortcut?
Stay on the official route and avoid turning the moment into a trailhead argument. If the shortcut is causing serious damage or enters a closed area, report it to the land manager when you can.
Does staying on marked paths protect hikers from snakes?
It lowers the chance of surprising a snake in dense brush, grass, or rock cover. Still, watch your footing, keep your hands out of cracks, and give any snake space to leave.
