
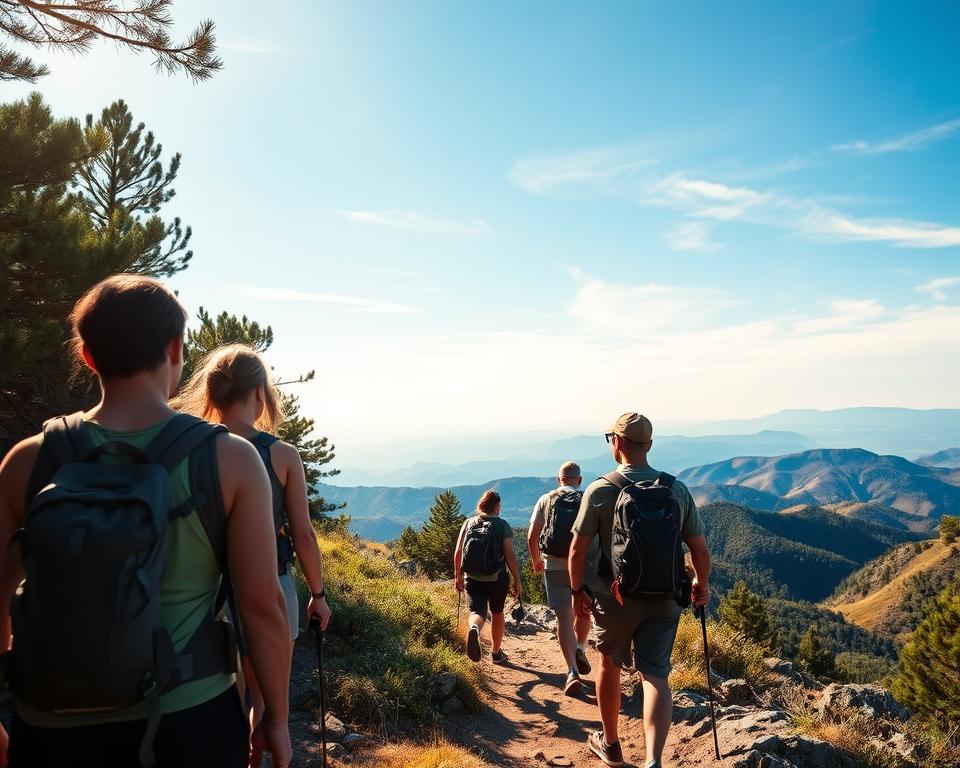
The first hour on a desert path decides whether your outing stays fun or turns risky. I’ve watched inner canyon temps climb past 110°F and felt radiant heat from dark rock like a furnace beneath my boots.
Practical choices matter: pick cooler lines, shift your time of travel, carry extra fluids and electrolytes, and test your pace against how your body feels. Early signs of illness — cramps, heavy sweating, dizziness — call for immediate cooling and shade.
Follow field-tested tips that match the weather and your gear, learn simple cooling tricks, and know when to stop or get help. For a step-by-step safety checklist, see this short guide: 10 ways to avoid heat emergencies on the.
Key Takeaways
- Start early or late to beat the hottest time of day.
- Choose shaded routes and pace yourself to lower core temperature.
- Carry water, electrolytes, and a small cooling kit for quick relief.
- Watch for cramps, weakness, and confusion — cool and seek help fast.
- Shorten or change plans when conditions exceed your comfort or skill.
Why hot-weather hiking raises your risk
When air and rock both pack heat, your body works much harder than you expect. In inner canyon settings, air can hit 110°F and dark stone throws back radiant energy that pushes perceived temperatures higher.
High temperatures and hot weather stress your cooling system. Sun and hot air add energy while humidity slows sweat evaporation. That means your core climbs faster for the same effort.
Exposure time matters. The longer you stay in direct sun with little breeze, the more cramps, exhaustion, and worse can build—even if you’re drinking steadily. Steep climbs, heavy packs, and fast pace spike internal heat production.
People often miss early signs and blame poor sleep or nerves. Limited water access forces rationing, which reduces cooling ability as hours pass. Dry deserts can fool you, too—sweat can vanish so fast you don’t notice strain.
Watch your own symptoms and make practical choices: slow your pace, seek shade, and plan water refills. Crowds won’t change the math—risk depends on conditions, effort, and time on trail.
- Radiant rock plus air temp = extra load beyond thermometer readings.
- Long exposure and heavy effort speed the onset of illness and exhaustion.
- Missed signs lead to faster escalation; read your body early and act.
Plan your hike around heat, terrain, and water access
A clear plan for terrain and water makes hot days manageable. Check forecasts, study maps, and mark exits before you leave the trailhead. Small prep cuts risk on exposed routes and in canyon country where reflected heat raises perceived temperatures.
Check forecast highs, humidity, and advisories
Look at hourly weather and heat advisories for your route. Pick a start time that gets you past exposed sections before midafternoon peaks. Build an extra hour buffer for rest and unexpected delays.
Choose shaded routes and higher elevations
Compare alternatives and favor tree cover, morning shade, or higher ridges where air is cooler and breezier. Avoid long south-facing slopes and stretches of dark rock that amplify radiant heat.
Identify reliable water sources and bail-out points
Mark springs, creeks, and trailheads with vehicle access on your map. Confirm seasonal flow when possible and carry conservative water volumes so you never arrive dry.
- Plan short breaks in shade near water to check for early sign of exhaustion.
- Pick trails with clear bail-outs—roads, creek crossings, or shuttle stops—for quick exits.
- Share waypoints and exit plans with your group so everyone knows when to pivot.
how to prevent heat stroke hiking: timing and pace
Plan your pace around the sun’s daily arc so climbs fall in the coolest hours. Move major effort early or late and let the hottest part of the day be a long rest.
Start early, pause or slow between late morning and midafternoon
Begin at first light so steep sections finish before the sun and ambient heat peak. Hold an easy conversational pace uphill—if full sentences are hard, slow more.
- Schedule big climbs before mid-morning; save travel and short moves for evening.
- Build a midday siesta in shade: eat, cool, and nap before resuming when sun angle drops.
- Shorten break intervals as temperatures rise—five minutes in shade every 30–45 minutes helps avoid steady buildup and exhaustion.
- Use flexible turn-around times tied to temperature and wind instead of fixed mileage.
| Part of day | Typical temperatures | Action |
|---|---|---|
| Early morning | Cooler | Push climbs |
| Late morning–midafternoon | Highest heat | Rest in shade |
| Evening | Cooling | Resume moving |
Teach a pause protocol: when someone feels dizzy or nauseous, everyone stops and cools. Keep climbs steady—avoid surges that spike output and force long recovery in the sun. These simple rules help you enjoy the trail and limit exhaustion on any hike.
Hydration and electrolytes that actually work
A steady sipping routine beats occasional gulps when the sun and effort climb together. Start with simple habits and you’ll avoid most surprises on the trail.
Prehydrate and sip steadily
Prehydrate a few hours before you leave. Drink a glass or two, then sip small amounts during the route. Aim for two or three mouthfuls every 10–15 minutes rather than big gulps. During intense exertion, losses can reach about a quart per hour—plan for that when the day gets hot.
Match fluids with salts
Pair plain water with electrolyte options. Use sports drinks, powdered mixes, or salty snacks to lower the chance of cramps and steady energy. Carry a hydration bladder for easy sipping and at least one hard bottle as backup in case the bladder fails.
Monitor output and adjust
- Watch urine: pale and frequent means you’re keeping up; dark or scarce output flags dehydration.
- Increase both fluid and electrolyte intake when effort or ambient heat rises.
- Pack extra powder packets or salty snacks so you have plenty on hand if appetite drops or exhaustion sets in.

Clothing, sun protection, and skin safety in summer
Simple clothing swaps can cut sun damage and keep your body cooling while you move. Pick garments that block rays but still let air flow. Small choices make a big difference for comfort and safety.
Wear light, loose, light-colored, tight-weave layers
Choose tight-weave fabrics that block UV and light colors that reflect solar load. Loose fits let sweat evaporate, so your cooling system keeps working. Quick-dry nylon or merino blends balance comfort with breathability.
Use a wide-brim hat, sunglasses, and neck coverage
Wear a wide-brim hat that shades your face, ears, and scalp. Pair it with UV-blocking sunglasses for eye protection.
Cover your neck with a sun cape, buff, or bandana. Wetting that layer at breaks cools blood near the surface and feels refreshing in dry air.
Apply SPF 30+ broad-spectrum sunscreen; reapply every two hours
Apply broad-spectrum sunscreen SPF 30+ 15–30 minutes before you start. Reapply every two hours or sooner if you sweat heavily. Keep a small bottle in your pocket so reapplication actually happens.
Reduce sun exposure during peak UV hours
Look for shade and breeze between 11 a.m. and 3 p.m. A short detour into trees or a break in a canyon cut can lower your core load and protect skin at the same time.
- Avoid dark, heavy fabrics that trap warmth; pick quick-dry materials.
- Prefer a hat with a 2–3 inch brim or a legionnaire style for added neck coverage.
- Treat sun protection as part of your cooling plan — no sunburn means your body cools better.
| Feature | What to pick | Benefit |
|---|---|---|
| clothing | Light color, tight weave, loose fit | Blocks UV, reflects sun, allows evaporation |
| hat | Wide brim or legionnaire | Shades face, ears, and scalp from direct rays |
| sunscreen | Broad-spectrum SPF 30+, small pocket bottle | Protects exposed skin; easy reapplication |
| neck | Buff, sun cape, wettable bandana | Rapid local cooling and added coverage |
Smart load, route, and schedule adjustments on hot days
Little changes in pack weight and timing often make the biggest difference on sun-baked trails.
Drop nonessential gear so your body works less on steep grades. A lighter pack cuts effort and lowers core rise on long climbs.
Shorten mileage and trim elevation on the hottest days. Save big objectives for cooler forecasts and windy afternoons when your pace won’t push you toward exhaustion.
- Swap exposed sections for shady forest or north-facing lines that offer steady breeze.
- Start earlier and build longer shade breaks—this small time shift often beats chasing cooling later.
- Replace long blacktop links with dirt or shuttle segments; paved surfaces radiate extra warmth that wears you down.
- Set a group pace for the least-acclimated member and stage cold-soak snacks plus electrolyte packs for the afternoon slump.
Watch your signals. Lightheaded steps or vague nausea are signs you should change the plan right away rather than waiting for a bigger crash.
Recognize early signs before they escalate
Spotting early warning signs on trail lets you act before things become dangerous. Read symptoms quickly and make a simple choice: rest, cool, or get help.
Heat cramps
Painful muscle spasms in calves, thighs, or belly often come with heavy sweating and salty loss. Darker urine can appear early.
If cramps start, stop moving, gently stretch the affected muscles, sip electrolyte solution, and sit in shade while you recover.
Heat exhaustion
Watch for dizziness, nausea, weakness, pale or clammy skin, rapid pulse, and reduced urine output. These are classic signs of heat exhaustion and dehydration.
Move the person into shade, loosen clothing, give cool fluids with salts, and monitor closely—this can worsen quickly if ignored.
Heat stroke
This is a life-threatening condition: very high body temperature, confusion, altered behavior, rapid breathing, and a racing heart. Skin may be hot and dry or still sweating.
Treat as an emergency—call for medical help, cool aggressively, and don’t wait for all classic signs to appear.
- Early dehydration often starts with headache, irritability, and less urine—link these clues to pace and exposure.
- Keep the group talking about how they feel so subtle symptoms get caught early on exposed ridges or canyon benches.
- When unsure, treat the worst-matching symptom set as the priority—waiting lets exhaustion escalate.
On-trail cooling methods to lower body temperature fast
Small, decisive cooling steps can drop core heat fast and stop symptoms from growing.
First, move into shade and sit. Loosen layers, breathe slow, and set a plan that works within minutes.
Next, douse a hat, shirt, and bandana with cool water and place wet cloths on the neck, armpits, and groin. That pulls warm blood toward the surface and lowers body temperature quickly.
If a stream or pool is nearby and safe, soak feet or lower legs. Partial immersion drops core heat while you rest and keeps the body supported.
- Create airflow with a hat, map, or lightweight fan—evaporation speeds cooling, especially in dry air.
- Sip water steadily while you cool; add electrolytes after nausea eases to fight exhaustion.
- Rotate wet cloths and re-wet as they warm; keep the cycle until pulse and thinking calm.
- If no natural shade exists, rig a tarp or emergency blanket low to the ground and lie flat for better cooling.
- Note the time cooling began so you can track progress and decide whether to stop the hike.

Immediate steps if symptoms appear
A clear, calm response in the first minutes often makes the difference between recovery and an emergency. Stop all exertion and move the affected person into shade right away. Have one person start cooling while another organizes navigation and communication.
Stop exertion, shade, water, and airflow
Loosen tight clothing and sit the person reclined with feet slightly raised if dizzy. Give small, frequent sips of cool water unless they vomit or can’t swallow. Create airflow with a hat, pack lid, or map—evaporation cuts temperature fast.
Use cool immersion or wet cloths on key areas
If a creek or tub is safe, immerse up to the neck and monitor breathing and pulse. If immersion isn’t possible, soak clothing and place wet cloths at the neck, armpits, and groin. Those sites cool large blood vessels and lower body temperature more quickly.
When to call 911 or activate emergency services
Call 911 immediately if the person has confusion, fainting, seizures, very high body temperature, or rapidly worsening breathing. Also call if they can’t keep fluids down, become less responsive, or if focused cooling fails to improve them within minutes.
- Keep the person awake and responsive while monitoring pulse and breathing.
- Continue aggressive cooling during the entire wait for help—don’t stop when skin feels cooler.
- If symptoms match exhaustion and don’t improve after about an hour of rest and cooling, seek medical care even if there’s partial improvement.
- After stabilization, end the trip and review choices that led here so you don’t repeat them.
High-risk environments: desert canyons, blacktop, and exposed rock
Sun-baked canyons and open roads create a different kind of trail math that chews through reserves faster than tree-lined paths. In places like the Grand Canyon, inner canyon temperatures have hit 110°F and tall, dark walls throw back radiant energy that feels oven-like on your skin.
Grand Canyon and inner canyon heat: radiant and reflected effects
Radiant load from dark metamorphic walls and bright sand multiplies the ambient reading. Plan short days, pick routes with longer morning shade sections, and anchor your day around reliable water access.
Roads and boulder fields: reflection and amplified exposure
Blacktop stores and radiates warmth. Cinder paths and boulder fields reflect sun up onto your legs and torso, so cooling feels slower and exhaustion arrives sooner.
- Wear a wide-brim hat and cover exposed skin on long open stretches.
- Move major mileage in cooler parts of the day and carry extra water.
- Read subtle signs—mild nausea or lost appetite—and slow before you feel wobbly.
- Pre-plan exits and commit to them when the day flips from manageable to draining.
| Environment | Primary hazard | Practical change |
|---|---|---|
| Inner canyon | Radiant/reflected heat | Short days, morning shade, water anchors |
| Blacktop | Surface radiation | Shift miles early, use shady detours |
| Boulder fields | Reflected sun from below | Leg coverage, slower pace, extra fluids |
Trip prep checklist for preventing heat illness
A short, printed checklist at the trailhead keeps decisions quick when the day warms up.
Research your route: map shade, exposure, and trail surfaces. Set conservative time goals tied to forecast temps and wind.
- Plan water: start full, carry a bladder plus a hard bottle, and mark guaranteed refills so you never rely on one source.
- Pack electrolytes and plenty of salt-forward snacks you’ll eat even if appetite drops.
- Dress for cooling: light, loose, light-colored clothing, a brimmed hat, and a wettable neck cover.
- Set group rules: call out symptoms early, assign a pace lead, and agree on turn-around criteria before you leave.
- Build a cooling kit: small towel or buff, a zipper bag for ice, and a light tarp for quick shade.
- Carry hydration and first aid basics: blister care, anti-nausea options as advised by your clinician, and a short cramps guide.
- Prepare emergency comms: phone in airplane mode to save battery, plus a satellite messenger if service is unreliable, and a clear help plan.
| Action | Measurable goal | Exit trigger |
|---|---|---|
| Route & time | Shade mapped, conservative schedule set | Delays >30 minutes during hottest hours |
| Water & bottle | Start full, bladder + 1 bottle, refill points marked | Output dark or dehydration signs |
| Symptoms & first aid | Everyone knows cramps protocol and emergency steps | Worsening symptoms after 20–30 minutes of cooling |
| Comms & group | Phone + satellite, shared plan with people on route | Confusion, repeated vomiting, or loss of responsiveness |
Share this sheet with your group and save a copy on your phone. When things feel off, use the checklist and end the hike early—safety beats finishing mileage.
Conclusion
Acting early — slowing, cooling, and drinking — is the fastest way to stop symptoms from escalating. Use shade, cool water, and airflow when your body temperature climbs and rest before things get worse.
The core plan is simple: start early, pace your day, carry real refill points, and keep electrolytes handy. These steps cut the chance of heat exhaustion and reduce the risk of heat stroke on exposed trail days.
Watch for dizziness, nausea, cramps, confusion, or a pounding pulse. If someone becomes hot to the touch with altered behavior, treat it as an emergency and cool while calling for help.
Choose breathable clothing, pick humane miles for the weather, and be willing to end the hike early. Small, repeated choices make summer outings safer and more enjoyable.
