
Have you ever planned a day outside only to find the parking full and the path packed within the first mile?
I’ll show you how smart planning and movement choices let you skip congestion without driving hours into the backcountry. I use event-style thinking: arrange flow before you go so the outing stays safe and enjoyable.
My simple framework helps you judge density and pick a route that fits your group’s comfort. You’ll learn when to shift plans, which trailheads to favor, and why chasing “secret” spots usually fails.
I’ll preview practical tools: map pinning, turnout triggers, and a buffer plan so you can switch routes without stress. Safety anchors every choice—less time at choke points lowers risk for everyone.
Key Takeaways
- You can avoid packed paths with planning, not long drives.
- A density framework helps match hikes to comfort levels.
- Choose route shape and trailhead to reduce congestion and exposure.
- Use simple tools: map pins, triggers, and backup options.
- Prioritize safety by minimizing time at choke points.
Start with the difference between crowd management and crowd control on trails
I start every outing by picturing where people slow and then plan around those spots. That simple mental map sets the tone: prevent jams before they form, and stay ready to act if things go wrong.
Trail crowd management as proactive planning for flow, comfort, and safety
Proactive crowd management means you plan timing, route shape, and short pauses to keep flow steady. You pick start times and passing points so your group stays comfortable and safe.
Good planning lowers risks and cuts the chance of incidents. Simple protocols and clear communication stop small delays from turning into bigger problems.
Crowd control as reactive decisions when congestion or unsafe behavior shows up
Crowd control is what you do when movement already stalls: wait, reroute, or turn back. These reactive moves restore safety fast and reduce conflict with other people.
Adopt quick control steps—hold the line at a narrow bridge, send faster hikers ahead, or pick a bypass. That calm response limits risks and helps everyone move on.
| Approach | When to use | Example |
|---|---|---|
| Proactive planning | Before leaving: timing and route choice | Start early, set passing points |
| On-the-spot control | When congestion or unsafe behavior appears | Wait, reroute, or brief the group |
| Simple protocols | Throughout the hike | Clear signals for passing and regrouping |
Set your goal for crowd density before you choose a trail
Set a clear density goal so your hike matches how your group likes to move and stop.
Start by defining what “too crowded” means for you. Decide if seeing people every few minutes is fine. Or set a rule: no stop-and-go movement for longer than two minutes.
Use this quick self-check: if you cannot keep a natural walking pace for more than a few minutes, density is already driving your experience.
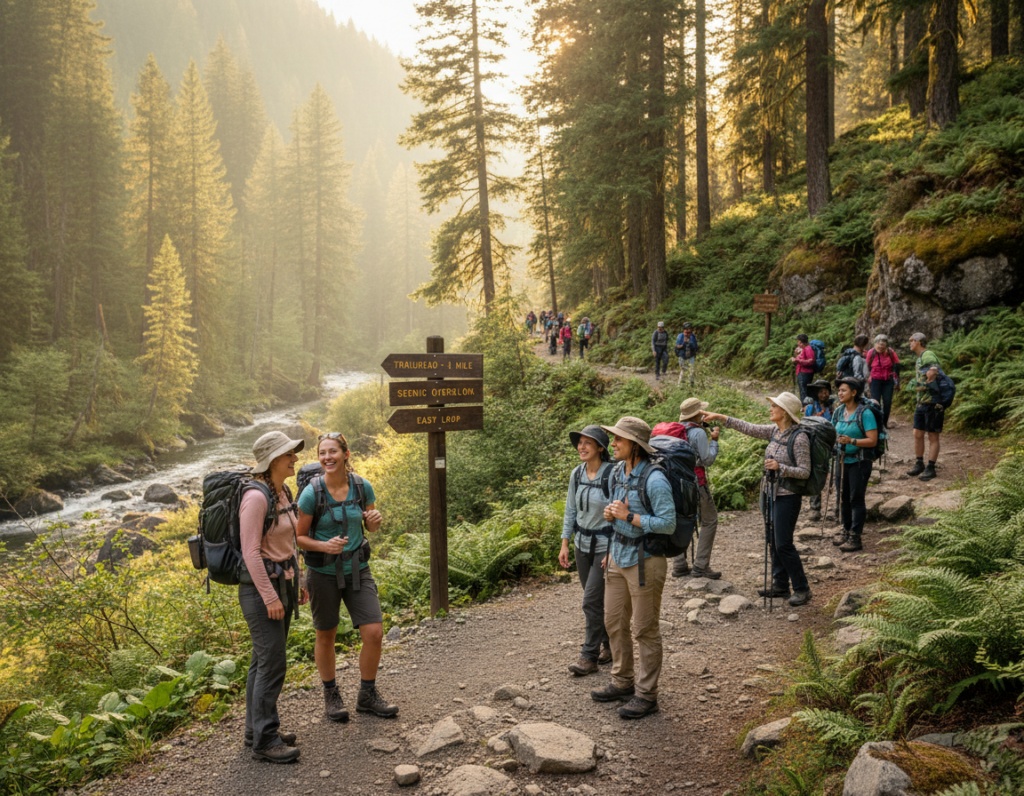
- Predictable spike points: first half-mile, major junctions, bridge crossings, steep scrambles, and famous viewpoints.
- Photo stops often create micro-jams even when the rest of the path feels open.
Your goal changes choices. A family needs wider step-aside areas. Solo hikers can accept tighter spacing. Those targets guide planning: start time, turnaround time, and route shape.
| Group type | Density target | Key planning choice |
|---|---|---|
| Family with kids | Low — few stops, clear passing space | Early start, short loop |
| Small friends group | Medium — occasional pauses allowed | Side spurs, set passing points |
| Solo hiker | High tolerance — flexible pace | Longer ridgelines, later start |
Use trail crowd management to plan around peak times in the United States
I focus on timing first: shift your start or finish and you often avoid the busiest windows entirely. Simple timing choices cut waiting, reduce congestion, and improve safety for everyone on the route.
Pick lower-traffic start times and turnaround times
Start very early to beat the parking wave, or begin later when morning groups are leaving. Turnaround timing matters: many spurs and viewpoints peak mid-morning.
Use weekday timing and school-calendar awareness
Check local school breaks, federal holidays, and three-day weekends before you commit. Weekdays and non-holiday mornings usually have fewer attendees and steadier movement.
Plan around weather swings and build a buffer
A surprise warm Saturday draws people; light rain thins numbers but slows passage on slick sections. Leave a 60–90 minute buffer so you can reroute or delay without rushing.
Quick decision rule
- If parking is full on arrival, switch early rather than waiting as density builds.
- Use simple monitoring tools and signals to communicate plan changes to your group.
| Trigger | Action | Why it helps |
|---|---|---|
| Full lot on arrival | Move to backup access or delay start | Prevents long waits and reduces congestion |
| Local school holiday | Avoid midday hours or pick less-known access | Reduces attendee surges and preserves experience |
| Warm forecasted weekend | Start earlier or choose shaded corridors | Anticipates demand spikes and keeps movement steady |
Choose routes that manage flow instead of chasing “secret” locations
Choosing the right path shape makes the day feel calmer and moves people more smoothly. I pick routes that spread people out so passing stays simple and safe.
Prefer loops and lollipops: loops disperse hikers across the circuit, so you avoid long head-on clusters. A lollipop concentrates traffic on the stem but then opens into a loop where movement eases.
Look for wider corridors on the map. Wider sections let groups pass without forced stops. Note narrow ridgelines, scrambles, ladders, and bridges—these bottlenecks create delays and photo jams.
Use alternative access and secondary entry points to split parking demand. Two nearby entry areas often cut congestion at the main lot.
| Route shape | How it helps flow | What to watch for |
|---|---|---|
| Loop | Disperses people, fewer head-on passes | Single narrow approaches to viewpoints |
| Lollipop | Easy access early, then spread on loop | Stem can bottleneck at start |
| Wide corridor | Smoother passing and steady movement | Sections may narrow at water crossings |
Be realistic: a secret spot with one small parking area still fills fast. A flow-friendly route stays comfortable even when people show up. For more planning help, see a quick checklist on route choices at route choices.
Map entry, exit, and pinch points like an event venue layout
I read access points and pinch spots the way an event planner reads a floor plan. Start with a quick sketch on your phone or a printed map: mark where people arrive, where they stop, and where they can leave fast.

Identify entry points, parking limits, and the first half-mile slowdown
Note every entry and the lot size. A full lot is your first density trigger—plan a backup access or delay start.
Mark the first half-mile. Mixed paces, map checks, and gear adjustments often create a bottleneck there.
Mark exit options and bailout routes
Add clear exit lines on the map. Short connector paths and service roads make quick dispersal in bad weather or injury.
Flag high-traffic areas and step-aside zones
Pin viewpoints, lake edges, and popular photo stops as high-use points. Also mark durable side areas where you can step aside without damaging vegetation.
| Map marker | What to note | How it helps |
|---|---|---|
| Entry | Lot size, approach road, overflow | Predicts circling and roadside parking |
| First half-mile | Speed variance, signage, obstacles | Prevents early bunching and delays |
| Exit | Connectors, service roads, bailout | Speeds dispersal for safety or emergency |
Map these points before you go. That simple event-style planning keeps flow steady and lowers risk for everyone on the route.
Use communication and simple “signage thinking” to reduce confusion on-trail
A few simple calls and pinned waypoints stop mid-hike guesswork before it starts. I set clear rules with my group before we move so we avoid jams and unsafe pauses.
Set clear group protocols for pace, passing, and regroup points
Decide who leads and who sweeps. Say it out loud: “Leader sets pace, sweep checks the map.” Short calls work best.
- Standard calls: “single file 30 yards,” “pass on the left,” “stop fully off the path.”
- Regroup markers: “meet at the next junction sign” or “regroup at the big boulder.”
- Keep spacing: ask people to spread five to ten seconds apart when climbing or at viewpoints.
Use offline maps, pinned waypoints, and shared notes for route clarity
Pin the start, bailout route, and turnarounds in an offline map. I share one note with times and escape options so nobody guesses mid-hike.
Use handheld radios or a group chat for teams and staff-style coordination on bigger outings. Good systems cut confusion and speed decisions.
| Tool | What to say or pin | Why it helps |
|---|---|---|
| Verbal signals | “Single file 30 yards” / “Pass left” | Quick, clear direction reduces hesitation and unsafe crossing |
| Pinned waypoints | Start / Turnaround / Bailout | Prevents map huddles and keeps movement steady |
| Shared note or chat | Turnaround time, meeting points, emergency plan | Everyone has the plan—less guesswork, faster response |
Light-touch crowd control starts with good communication. When people know the plan, pauses stay brief and the group moves with confidence.
For a quick route checklist and extra planning tips, see route choices.
Apply physical crowd management techniques to common trail congestion scenarios
A short, clear system at pinch points makes passing smooth and keeps people off fragile edges. I use simple physical techniques that are easy to picture and even easier to try.
Queueing at viewpoints and narrow sections
Set one tidy line for photos. Ask quick shooters to step aside to a durable spot. Use a visible gap—about three paces—so others can pass without squeezing.
One-direction choices on short spurs to reduce cross-traffic
Make short spurs one-way when they are popular. Go out, enjoy the view, then return the same route. That unidirectional control cuts weaving and speeds movement.
Spacing rules to prevent bunching and trail-edge damage
Keep fixed spacing on steep descents: one trekking-pole length between hikers. That buffer reduces slips and stops people from stepping off the tread and widening fragile areas.
These techniques lower density, improve flow, and boost safety. Calm, polite requests work best when you need to apply crowd control. Fewer jams mean fewer falls and less stress for everyone.
Use real-time monitoring tools to adjust before the trail feels packed
I watch live signals before I commit so I can pivot calmly when numbers rise. Small checks at the car and while hiking cut guesswork. They keep the day fun and safe.
Check live parking, permits, and recent reports
I scan live parking status, permit openings, and same-week reports. Permits and timed entry often create arrival waves. Spotting that early helps me pick a different start or time.
Watch movement speed and set turnaround triggers
Monitor your group’s pace: if you slow without terrain reasons, density is likely the cause. Use clear triggers: for example, “two waits over ten minutes equals switch.” Those rules remove stress and speed decisions.
Switch early to nearby backup routes
I keep two backup routes within 30 minutes of the car. Early switches work: parking fills and choke points worsen fast. A quick pivot feels like a smart move, not a defeat.
- Tools and systems: live lots, permit portals, and park reports.
- Decision points: pace drops, long waits, or full lots.
- Strategies: pre-pinned backups and calm communication.
| Signal | Action | Why it helps |
|---|---|---|
| Full lot | Use backup access | Avoids long waits and higher density |
| Permit surge | Delay start or choose alternate routes | Prevents concentrated arrivals |
| Pace drop | Apply turnaround trigger | Keeps movement steady and morale high |
Put safety and emergency protocols into your low-crowd plan
Start with a short safety plan: who does what if someone is hurt or the weather turns. I use clear roles, an exit route, and simple signals so decisions happen fast and calm.
Reduce risk at busy entry points, road crossings, and steep choke points
Keep meet-up spots off the main path and do gear checks away from the lot. Cross roads as a tight group with one person watching traffic and one calling pauses.
At steep narrows let one person move at a time. Others wait in stable, durable spots—no one stands below another hiker.
Keep an exit plan for injuries, storms, or sudden surges
Pick two exits before you leave: the fastest route out and a safe detour. Decide who goes for help, who stays with the injured person, and where to meet if separated.
Coordinate roles like event staff
- Leader: sets pace and triggers an exit.
- Navigator: carries the offline map and points out hazards.
- Sweep: counts personnel and carries the first aid kit.
- Comms: keeps phone, radio, and a simple regroup protocol.
| Role | Main task | Why it helps |
|---|---|---|
| Leader | Make go/no-go calls | Speeds emergency response and control |
| Sweep | Account for people, carry first aid | Reduces risks from missed injuries |
| Comms | Manage phone, signal, and meet points | Keeps teams coordinated during incidents |
Conclusion
Finish strong: plan movement and simple rules so the day feels roomy and safe. Treat your outing like a small event—set when you start, how you pass, and where you turn back.
Use this short checklist: define a density goal, pick timing, choose a flow-friendly route, map pinch points, and set clear group protocols. Rely on live tools and an early backup so you switch before things get tight.
Know when to plan and when to react: proactive crowd management keeps issues small; on-the-spot control restores flow. A safety-first approach reduces risk and makes popular hikes feel spacious.
Practice these strategies on familiar paths to build confidence before bigger adventures.
