
On our first local trail I carried the big family backpack and my youngest toddled beside me, proud to hold a tiny water bottle. Over the next few outings we moved to letting the kids carry their own small day packs. That shift changed the vibe of our hikes: kids felt useful and we all learned to pack light and smart.
I’ll share what worked for short walks and full National Park days. You’ll get clear tips on choosing a good kid-sized pack, using rain covers and carabiners, and breaking in shoes to cut blisters. I also point out small items that have big impact, like headlamps, whistles, and lightweight rain layers from retailers such as REI.
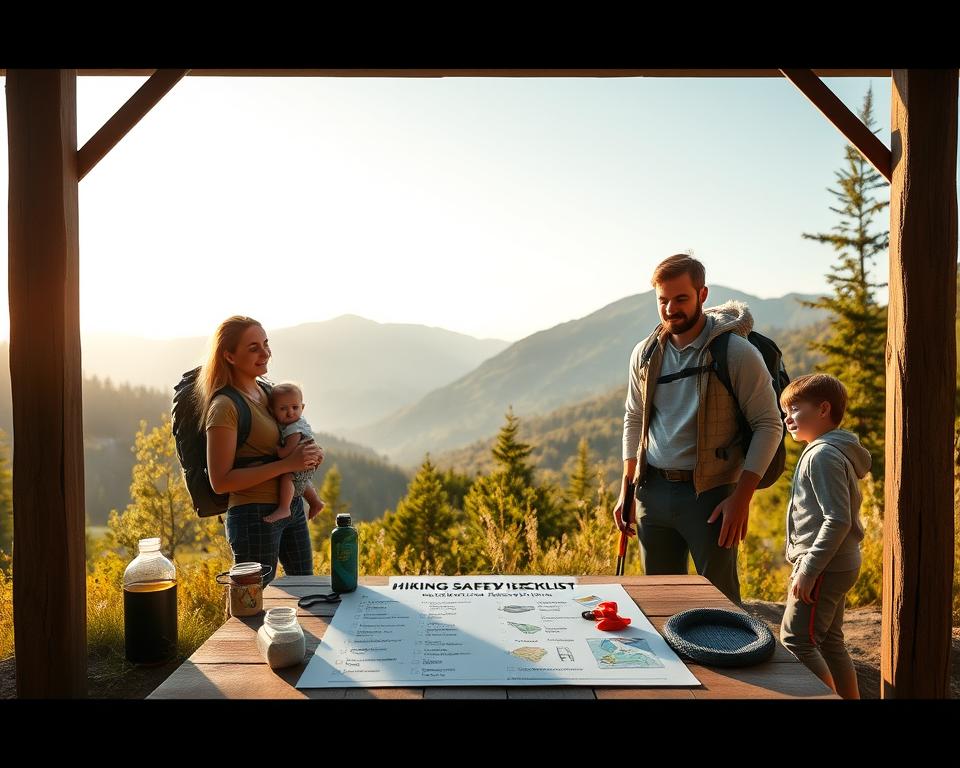
This short list will help you plan a calm start, steady pace, and an easy reset after your next nature trip. The goal is a practical plan that grows with your kids and fits your experience.
Key Takeaways
- Start with one adult carrying the main kit, then shift weight to kids with small day packs.
- Choose hydration packs and 12–18L daypacks as kids get older and stronger.
- Pack light: rain covers, carabiners, and a whistle add safety without bulk.
- Break in footwear gradually to avoid blisters and reduce injury risk.
- Focus on water, weather awareness, and simple navigation for a smooth trip.
Before you go: plan your route, timing, and weather
A good plan starts at home: know the trail, the expected time, and the weather. Pick a hike that matches your group’s energy and set a simple turnaround time so you return well before dusk.
Check distance, elevation gain, and estimated duration. Look for recent trail notes about closures or muddy stretches. Download offline maps and charge your phone; a car charger is a reliable backup.
Share your plan with someone at the house. Tell them the exact trail name, start time, who is with you, and when to expect your “back at the car” text. Update that contact if plans change at the trailhead.
- Review hour-by-hour forecasts and daylight; pack layers and rain options.
- Teach kids basic map reading and set group rules for forks and breaks.
- Build in buffer time for snacks, photos, and kid-led detours.
| Trip Length | Energy Level | Turnaround Time | Packing Focus |
|---|---|---|---|
| Short (1–3 miles) | Low to Moderate | Return 30–45 min before dusk | Snacks, light layers, water |
| Medium (3–6 miles) | Moderate | Return 60–90 min before dusk | Extra layer, map, charged phone |
| Long (6+ miles) | High | Plan extra buffer; avoid late starts | Rain layer, first aid, backup power |
Dress smart: clothing and layers for kids and adults
Layering well lets everyone stay comfortable when the weather flips on the trail.
Start with a sweat-wicking base to move moisture away from skin. Add a warm mid layer like a fleece or lightweight insulated jacket for cool mornings. Finish with a light shell you can zip on for wind or rain.
Base, mid, and rain layers you can add or remove
Choose quick-dry shirts and pants, especially in summer, so wet clothing doesn’t chill. Packable rain jackets and rain pants from REI compress small and make a big difference if showers arrive.
Sun hats, warm hats, and gloves by season
Bring a sun hat for exposed sections and a thin warm hat plus gloves for cooler days. It’s easier to shed a hat than to wish you had one.
Packable rain jacket and rain pants in case of showers
- Dress everyone in base-mid-shell layers to adapt on the go.
- Keep one dry layer in a small stuff sack in each child’s pack.
- Adults: a compressible puffer adds reliable warmth with little bulk.
Footwear that keeps you safe on the trail
Choose footwear that grips, cushions, and fits—then break it in slowly.

Pick shoes or boots with a solid tread so you don’t slip on mud, wet leaves, or rock. Aim for a secure heel and a roomy toe box so toes won’t bruise on descents.
Break in new footwear in steps: wear them indoors, on errands, then on short local loops. Never debut brand-new shoes on a long hike.
- Match shoes to terrain: light trail shoes for smooth paths, mids or boots for rocky routes.
- Use moisture-wicking hiking socks and carry a spare pair for mid-hike swaps.
- Teach kids to report hot spots early; a sock tweak or tape stops blisters before they start.
- If a hiker uses orthotics, test them on short walks to confirm comfort and fit.
| Type | Best For | Key Feature |
|---|---|---|
| Light trail shoes | Short, smooth paths | Low weight, flexible tread |
| Mid-support shoes | Rocky or varied trails | Stiffer sole, more cushion |
| Hiking boots | Heavy packs or rough terrain | Ankle support and durable tread |
After the day, clean treads and let shoes dry completely so they are ready for your next family outing.
Choose the right packs: family backpack, kids’ day packs, hydration
We learned early that the right pack changes how kids move and what they carry on a trail. Pick simple, age-appropriate options so load and access are easy for everyone.
Hydration packs vs. day packs for different ages
For younger kids (ages 3–6), a small hydration pack with a bladder works well. It keeps water close and lets them sip without stopping.
By five to seven, many switch to a 12L day pack. Around age 7–8, an 18L fits snacks, a jacket, and a few supplies. Older kids often prefer a bottle inside larger packs.
Fitting tips so packs ride comfortably
Fit to torso length, not height. Tighten shoulder straps, clip the sternum strap, and snug the hipbelt so the load sits near the hips and does not bounce.
Handy add-ons: rain covers and carabiners
- Always add a lightweight rain cover; clip it with a locking carabiner for quick access.
- Use exterior carabiners to hold jackets, bug nets, or a whistle.
- Let each child carry a few personal items to build responsibility.
| Option | Best Age | Capacity | Key benefit |
|---|---|---|---|
| Hydration backpack | 3–6 years | 3–6L | Easy sip access, low bounce |
| 12L day pack | 5–7 years | 12L | Snacks, light jacket, small supplies |
| 18L day pack | 7+ years | 18L | More room; bottle or filter options |
Family hiking safety checklist: essential gear and supplies
A compact kit assembled the night before keeps the morning scramble calm. Lay out gear by role — what each adult and kid will carry — and group shared items in a single pouch so they are easy to grab.
Core kit: water and food
Water: plan at least 0.5 L per person for short day trips; add more for heat. Younger kids do well with hydration bladders, while older kids often prefer bottles.
Food: choose lightweight, high-energy snacks — trail mix, bars, dried fruit — plus a small salty option and a tiny treat for morale.
First aid, navigation, and light
First aid: bandages, blister care, gauze, tape, antiseptic wipes, tweezers, and any meds in a waterproof case. Let kids carry a mini zip bag with a few bandaids.
Navigation & light: download offline maps to your phone, tuck a paper map and compass in the pack, and give each person a headlamp; add one compact flashlight as backup.
- Emergency: whistle per hiker, waterproof matches or fire steel, knife/multi-tool, 25–50 ft paracord, and two heavy-duty trash bags.
- Sun & bug: broad-spectrum sunscreen, insect repellent, and a bug head net for kids in buggy seasons.
- Hygiene: TP, wipes, hand sanitizer, and zip bags to pack out waste.
| Category | Must-have | Tip |
|---|---|---|
| Water | 0.5–1L per person | Bladder for sip access; bottles keep drinks cold |
| First aid | Bandages, tape, meds (waterproof case) | Teach kids where the case lives |
| Navigation | Phone (offline), paper map, compass | Check phone charge and backup battery |
Kids’ safety add-ons that make a big difference
Empowering kids with a couple of easy tools builds confidence on every trail. Small, intentional items help them act fast and stay comfortable. Teach each child where their gear lives and practice quick drills before you head out.
- Give each child a whistle on the shoulder strap; teach three loud blasts for help and to listen for a response.
- Pack a child-sized headlamp so hands stay free for poles or scrambling; headlamps are easier than handheld lights for caves or late finishes.
- Choose light layers they can put on themselves—a thin fleece and packable shell that snap or zip quickly.
- Slip a bug head net into an outer pocket; it weighs almost nothing and prevents meltdowns in buggy sections.
- For older kids, suggest trekking poles for balance on rocks and descents; a small monocular keeps wildlife watching simple and low-bulk.
| Item | Best for | Why it helps |
|---|---|---|
| Clip-on whistle | All ages | Quick signal; practice three blasts |
| Child headlamp | Young kids, older kids | Keeps hands free; comfort if delayed |
| Light layers + net | All ages | Easy self-regulation; bug protection |
On the trail: simple rules that keep your family safe
I find one quick game at the trailhead sets the tone: eyes up, look for markers, and move as a group. This gets kids involved in navigation and makes staying on the marked way a shared task.
Stay on the marked trail and spot the next marker
Make spotting the next blaze a game. Calling out the next sign prevents wandering and teaches map reading without pressure.
Hike together and wait at forks
Walk as a single group and keep kids in view—arm’s reach for young children, voice range for older ones. Always stop at forks and agree on the turn before you move on.
Set a pace, take breaks, and pack out all trash
Choose a mellow pace you can hold and plan short five-minute water or snack stops to reset energy and focus. Carry a spare zip bag so every wrapper leaves with you.
Play to notice landmarks and conditions
Skip hide-and-seek. Instead play “I Spy” to spot sun position, trail surface changes, animal tracks, and bridges. Point out a bright rally item kids can watch for in busy areas.
- Teach trail etiquette: yield to uphill hikers and step aside for faster groups.
- Do quick group checks every few minutes so the day flows without strict rules.
If someone gets lost: teach the S.T.O.P. plan
When someone wanders off, a calm, repeatable routine makes all the difference. Teach S.T.O.P. so every child and adult knows one simple response they can use without thinking.
Stop: breathe, don’t panic, and stay put
Stop immediately. Take slow breaths and pick a visible spot to wait. Staying put keeps rescuers focused and reduces the chance of getting further lost.
Think: three whistle blasts and listen
Think clearly and use the whistle—three strong blasts—then listen quietly for an answer. Repeat the pattern every few minutes so helpers can find you by sound.
Plan: shelter, warmth, and visibility
If it’s cold or wet, use a poncho or trash bag as a windbreak and sit on dry leaves to stay insulated from the ground. Avoid moving after dark; moving makes you harder to spot and increases trip risks.
- Keep a headlamp or flashlight handy to signal if you hear the group nearby.
- Practice three-blast whistle calls at home so the pattern feels natural.
- Agree on a short phrase like “Find and Freeze” so a child remembers to stop and stay put.
- Store the whistle and small first-aid case where every child can reach it in their pack.
Weather, wildlife, and seasonal tips for U.S. trails
Knowing how weather, animals, and seasons behave where you hike makes the day calmer and more fun. Read the sky, pack smart, and build small habits that keep everyone comfortable.

Summer heat, shoulder-season rain, and mountain swings
In summer, start early, rest in shade, and sip water often. Sun hats and sunscreen protect necks and noses.
Shoulder seasons bring sudden showers. Keep a rain layer near the top of your pack for quick access.
On mountains, temps can change many times in a single outing. Pack one extra warm layer for higher elevation and cool evenings.
Seeing animals safely: distance, noise, and when to carry bear spray
Make steady noise in thick brush so animals aren’t surprised. Calm conversation and periodic clapping work well.
Enjoy animals from a distance. Binoculars give a close view without altering wildlife behavior.
In bear country, carry bear spray in an easy-to-reach spot and know how to deploy it. A compact water filter is smart on longer trips when refill sources are safe.
- Choose footwear with good traction for muddy or leaf-covered ways; slow down on slick sections.
- Plan your time with a heat or storm backup: choose shorter routes or set an earlier turnaround.
- Teach kids to notice clouds, wind shifts, and temperature drops; awareness makes them confident trail partners.
| Season | Key risk | Quick prep | Best gear |
|---|---|---|---|
| Summer | Heat, sun | Start early, shade breaks | Sun hat, sunscreen, extra water |
| Shoulder seasons | Sudden rain | Keep rain layer handy | Packable rain jacket, bug net |
| Mountain trips | Rapid temp swings | Bring an extra warm layer | Insulating midlayer, compact filter |
After the hike: quick reset for next time
A quick post-hike reset keeps gear fresh and reduces last-minute packing stress. Spend five to ten calm minutes at the house to empty, check, and stow items so the next day is easy to prepare for.
Empty and restock packs and first aid
Take five minutes post-hike to empty your backpack. Toss wrappers, collect loose items, and restock snacks and water bladders for the next day.
Open the first aid pouch and note what you used. Refill bandages, wipes, and blister care while it’s fresh in your mind. Keep a mini bag of spare tape and small bandaids ready.
Clean and dry footwear, layers, and rain gear
Clean mud from shoe treads and loosen laces so shoes dry evenly. Wipe rain jackets and hang clothing layers to air out and spot any small rips.
Test headlamp and flashlight batteries now, and replace them if needed. Returning items to their place in the house saves frantic searching before your next day out.
Tick and bug checks for everyone
Do a full-body tick check on each child and adult. Showering within a few hours helps spot hitchhikers early.
Keep a zip-top bag handy for small trash or found items. Jot one quick note about what worked and where to tweak packing next time, then celebrate the day’s wins and pick a tentative next trail.
- Five-minute empty: clear packs and toss trash.
- Refill: restock first aid, snacks, and water.
- Dry: clean shoes, hang layers, check gear.
- Check: full-body tick search and battery test.
- Store: return packs to their spot in the house and stash a mini reset bag for next time.
| Task | Why | Action |
|---|---|---|
| Empty packs | Remove trash, prep for packing | Toss wrappers, restock snacks |
| Gear care | Extend life, avoid odors | Clean treads, hang clothing to dry |
| Health check | Find ticks early | Full-body check and shower |
Conclusion
Simple habits make the next outing easier and more fun. Give each child a small role so they feel useful and learn real trail skills.
Keep one core list of essentials in your notes app and tuck a spare first-aid item into each backpack. Store pack pouches together so grabbing gear takes a minute, not an hour.
Before you go, run a five-point post and pre-trip routine: check water, layers, whistle, light, and snacks. Pick one small upgrade from this post—like adding a rain cover or practicing the whistle signal—and try it on your next hike.
With a simple plan and a lean kit, your family hiking experience will grow steadier over time. Note one tweak after each trip and watch good days become great ones. See you out there.
