
Hiking injury prevention tips start with small choices that add up: how you fit your pack, where you step, and how you fuel your body make a big difference. I remember the first time my hipbelt finally sat on the iliac crest — the load shifted off my shoulders and the whole day felt easier.
Train smart by building to about 75% of your planned mileage and use stairs when trails aren’t available. Keep hydration steady and snack often so muscles stay responsive and cramps are less likely.
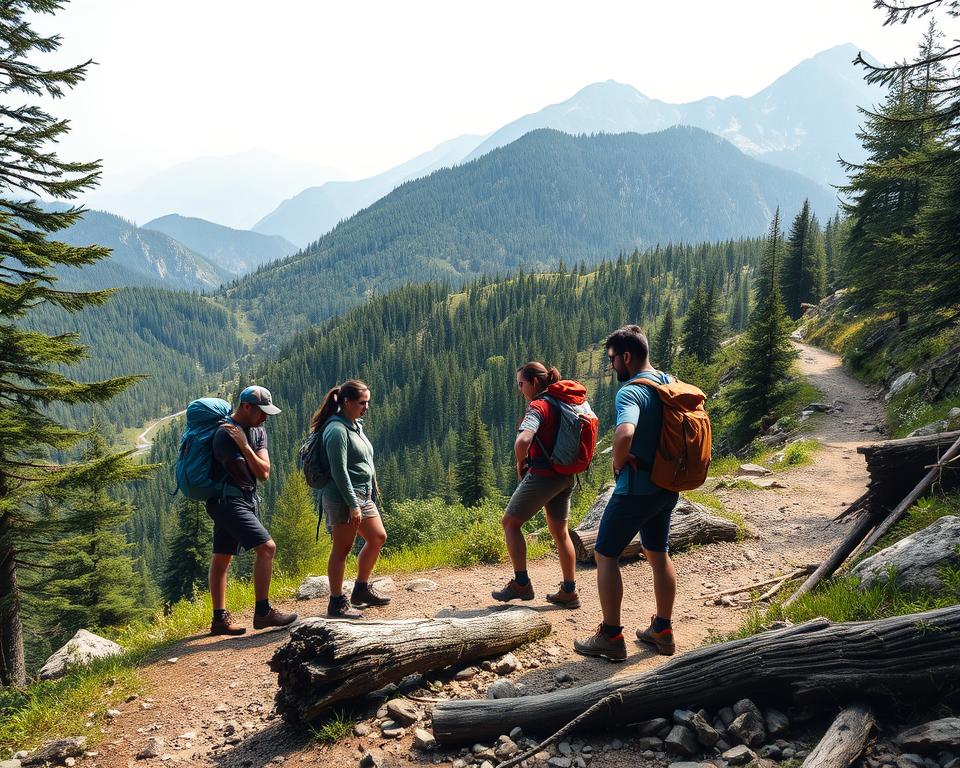
Choose stable sections of trail when you can, control your pace early, and use trekking poles on steep or loose slopes to offload knees and boost balance. Little decisions — where you step, when you rest — are your best way to reduce risk and enjoy the activity all day.
Key Takeaways
- A well-fitted pack on the iliac crest reduces shoulder strain.
- Train up to ~75% of planned daily mileage to prepare muscles.
- Hydration and steady fueling keep muscles working smoothly.
- Pick safer terrain and control pace to lower fall risk.
- Trekking poles improve balance and reduce lower-body fatigue.
Hiking injury prevention tips you can use today
Start your day on steady ground and set a safe rhythm for the hours ahead. A calm, stable cadence makes slips and trips less likely. Short strides and steady feet beat rushing on tricky surfaces.

Choose stable terrain early to set a safe pace
Begin on firm sections so your body finds its groove before the trail narrows. Scan 10–15 feet ahead for wet, slick, or uneven patches. When the surface looks sketchy, slow down and side-step rather than sprinting through.
Keep knees and ankles protected with supportive footwear and poles
Wear shoes with solid traction and ankle support. Cushioned socks reduce blisters; change them if they get wet to cut pain and hot spots.
Plant trekking poles just ahead of your feet on descents. Poles take pressure off your knees and steady your body on loose rock. Shorten poles for climbs and lengthen slightly for downhills to keep your torso upright and your muscles efficient.
Hydrate on a schedule and snack often to limit fatigue
Drink a few sips of water every 15–20 minutes. Eat small, nutritious snacks before you feel low so muscles keep firing well.
Take short, regular breaks to shake out calves and quads. A quick rest resets form and balance when the trail gets rough.
- Start on stable ground to lock in balance early.
- Scan ahead and shorten steps on slick or uneven sections.
- Use footwear with traction, swap wet socks, and lean on poles when needed.
- Drink often, snack early, and rest to protect knees and ankle joints.
Build a trail-ready body before you go

Train up to roughly 75% of your planned daily mileage to condition the neuromuscular system. Use stairs, hill repeats, or brisk walks when trails aren’t available.
Strength and warm-up
Strengthen legs and back with step-ups, split squats, hip hinges, and calf raises. Warm up for 5–8 minutes with leg swings, walking lunges, and ankle circles to wake muscles and joints.
Progress and recovery
Increase distance and elevation by about 10–20% per week. Cool down with gentle static stretches for calves, quads, hamstrings, and hips to cut next-day stiffness.
- Practice downhill control on stairs to protect knees and back.
- Add a light pack to some sessions to rehearse posture and foot placement.
- Log time, effort, and any hotspots so small problems don’t grow into injuries.
| Week | Target Distance | Elevation Gain | Key Activity |
|---|---|---|---|
| 1 | 3–5 miles | 200–400 ft | Stairs + mobility |
| 3 | 6–8 miles | 500–900 ft | Hill repeats + strength |
| 6 | 75% of planned day | Match route profile | Light pack + downhill practice |
Steady, small steps build a durable body for the day. This practical plan supports injury prevention and makes the hike feel easier when it counts.
Get the right gear and manage pack weight
Right gear and a balanced pack make the day easier and keep your body working well.
Wear shoes or boots with confident traction and real ankle support. Break them in on short walks before a long trail. Good fit cuts slips and reduces pain later in the day.
Carry a spare pair of dry, cushioned socks. Change damp socks as soon as you can. Dry fabric lowers friction and keeps blisters away.
Fit your backpack for comfort
Set the hipbelt on the iliac crest so the load rides on hips, not shoulders. Adjust shoulder straps, load lifters, and the sternum strap to light contact. Balance heavy items close to your spine and mid-back height.
Use poles for stability and muscle relief
Trekking poles add stability and spare knees on steep or loose downhills. Plant poles slightly ahead to smooth braking and reduce lower-body fatigue. If calves or quads tighten, lengthen a notch to offload muscles.
- Trim excess weight; carry only what you need for the day.
- Recheck pack fit after 15–20 minutes—straps settle and pressure points appear fast.
- Choose simple, durable systems you can adjust with gloves on.
| Item | Primary Benefit | Quick Check |
|---|---|---|
| Shoes/Boots | Traction and ankle support | Broken-in, no hot spots |
| Cushioned Socks | Reduce blisters | Carry a dry spare |
| Backpack Fit | Shifts weight to hips | Hipbelt on iliac crest |
| Trekking Poles | Stability and knee relief | Plant ahead on downhills |
Stay alert on the trail and control risk
Smart route study and steady scanning of the terrain cut risk on every mile.
Review maps before you go. Note bail-out points and stick to marked trails. Carry a paper map—phones lose signal.
Check the forecast at the trailhead. If thunderstorms or extreme heat are likely, change plans. Peak sun and lightning raise risk quickly.
Watch for wet rock, loose gravel, slick roots, icy patches, or snow. Slow your steps through each tricky section. Use a three-points-of-contact approach when footing is uncertain.
Take short breaks every 45–60 minutes. Sip water, eat snacks, and shake out your back and hips. Small rests cut fatigue and pain.
| Action | Why it matters | Quick check |
|---|---|---|
| Route review | Reduces time spent off-course | Map + bail-out points |
| Weather check | Avoids dangerous conditions | Delay for storms/heat |
| Scan terrain | Prevents slips and falls | Slow, steady steps |
| Pack essentials | Prepared for delays or case of being stopped | Headlamp, kit, warm layer |
Tell someone your plan and expected return. If you get off-route, stop, breathe, and consult your map. In many cases, staying put speeds rescue and limits injuries.
Conclusion
A few clear routines will keep your knees, back, and feet working well.
Build capacity with steady training and warm-ups, then protect that work with calm choices on the trail. Fit your backpack so the hipbelt carries the load. Trim weight and keep gear simple.
Use trekking poles on steep down sections and loose footing to ease muscle load. Drink on a schedule, snack early, and add elevation and distance in small steps to avoid flare-ups and pain.
Plan routes, carry a light first-aid kit and flashlight, and tell someone your plan. Move with patience and finish with room to spare — that’s the best way to enjoy more hikes tomorrow.
